Milestones Use Case - Pregnancy
A common use case for the Milestones AppBlock is for pregnancy.
Click here to download the CSV used in this example.
Setup
Registration
Make sure your Access Manager is set to "Registration Required". Go to Access Manager > Data Mapping. Add three fields:
- Due Date (Date)
- Last Cycle (Date)
- Name (Text Box) **NOTE**This field is not required for a Milestones AppBlock to function properly.
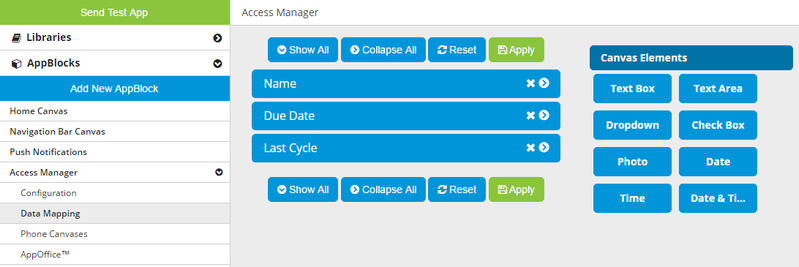
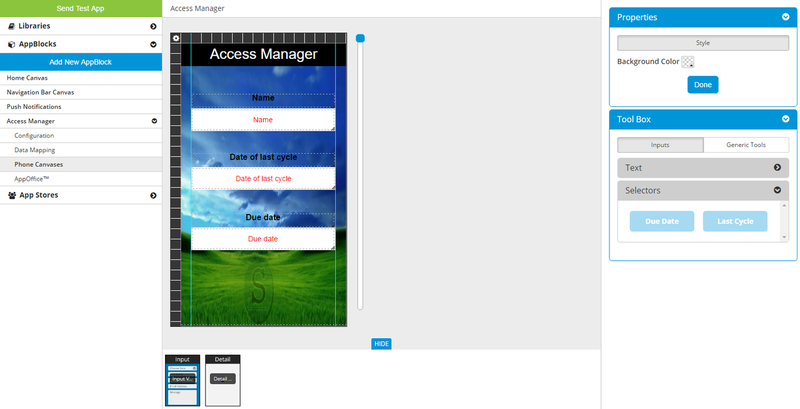
Go to Access Manager > Phone Canvases. Go to the Input canvas. Add the three fields to the canvas and style them to your liking.
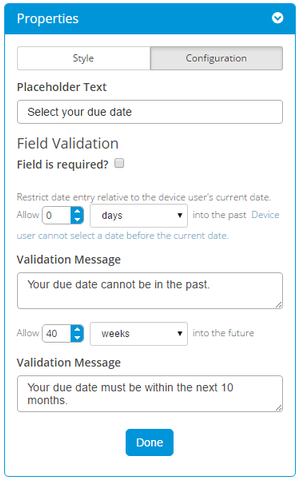
Click on the Due Date field and then, in the Properties box on the right, go to the Configuration tab.
Enter some Placeholder Text, such as "Select your due date".
Now go to the Field Validation section. A due date should be in the future, so set the past date range to allow 0 units (days/weeks/years) in the past - the unit doesn't matter in this case, since the number is 0. Enter a validation message, such as "Your due date cannot be in the past."
Set the future range to allow 40 weeks (10 months) into the future. Enter a validation message, such as "Your due date must be within the next 10 months".
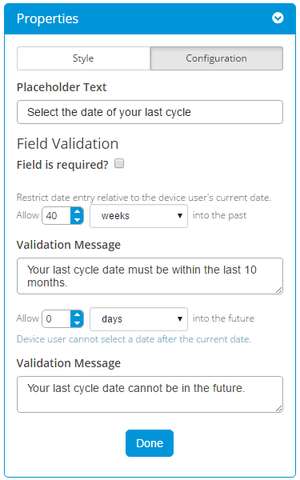
Click on the Date Of Last Cycle field and then, in the Properties box on the right, go to the Configuration tab.
Enter some Placeholder Text, such as "Select the date of your last cycle".
Now go to the Field Validation section. Set the past date range to allow 40 weeks (10 months) in the past. Enter a validation message, such as "Your last cycle date must be within the last 10 months".
A last cycle date should be in the past, so set the future date range to allow 0 units (days/weeks/years) in the future - the unit doesn't matter in this case, since the number is 0. Enter a validation message, such as "Your last cycle date cannot be in the future".
Go to the Detail canvas - this page will show the app user the data she entered on the Registration input page.
Add the fields to the canvas and style the page to your liking.
Milestones AppBlock
Click "Add New AppBlock". Enter a name, such as "Milestones - Pregnancy", select "Flex AppBlock", and click "Apply".
Configuration
Now find your new AppBlock in the left-hand menu, click it to expand, and go to the Configuration page.
For the "Choose a List Type" dropdown, select "List of Milestones" and click "Apply".
On the Registration Fields tab, select "Due Date" as the Primary reference field. Set it as an Ending Milestone.
Select "Last Cycle" as the Secondary reference field. Set it as a Starting Milestone. Click "Save Reference Fields".
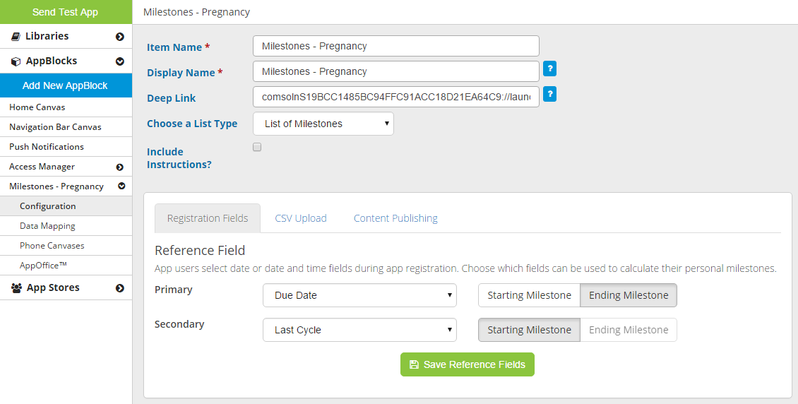
You could also switch it up and select "Last Cycle" as the Primary reference field. This only comes into play if the app user selects a date for both fields - the platform will use the date set as the Primary reference field for calculating all the milestone dates.
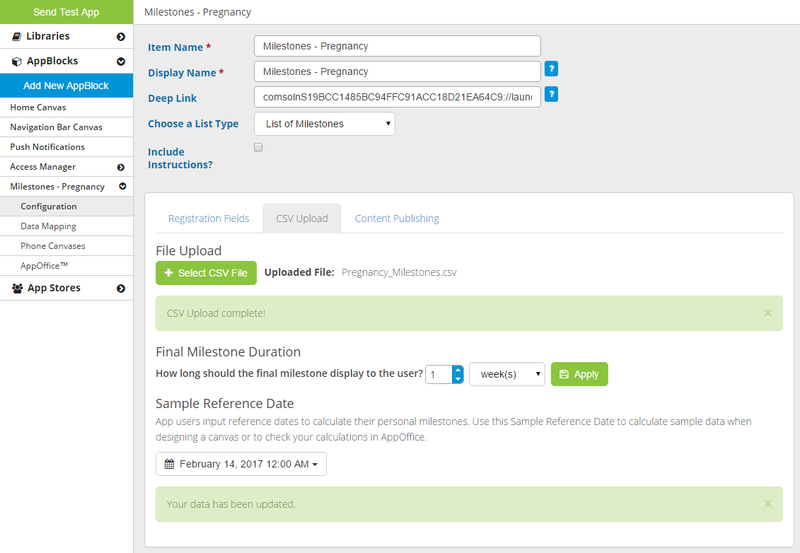
On the CSV Upload tab, upload your CSV file - you should see a success message.
Change the Final Milestone Duration if desired (default is 1 week).
Select a Sample Reference Date - you should see a success message.
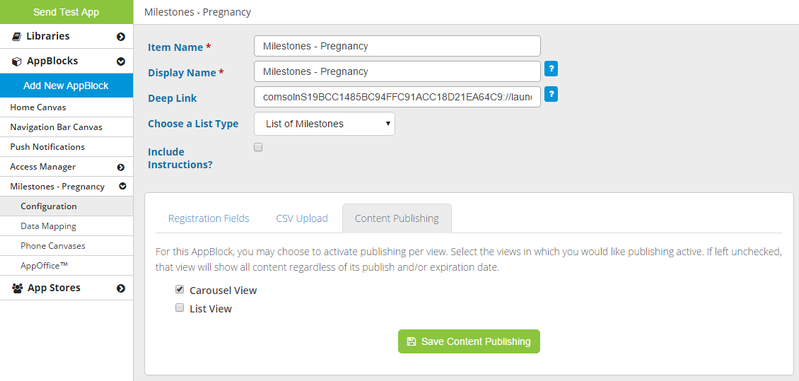
On the Content Publishing tab, check "Carousel View", leave "List View" unchecked, and click "Save Content Publishing".
Data Mapping
In the left-hand menu, go to Milestones > Data Mapping.
Assign each field the appropriate Field Type and click "Apply".
Phone Canvases
In the left-hand menu, go to Milestones > Phone Canvases.
Open the Tool Box, go to the My Content tab, drag fields onto the List View canvas and style them to your liking.
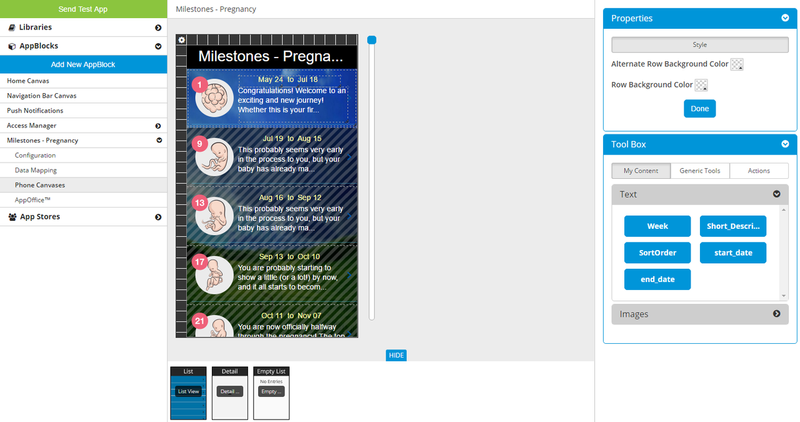
Go to Detail View and drag fields onto the Detail View canvas and style them to your liking.
You can ignore the Empty List View canvas. Since you left "List View" unchecked for publishing, the List View will always show all the items.
Carousel
The Carousel feature allows you to display a single item from a list on the Home page. For a pregnancy app, you can use the Carousel to display the appropriate week (of pregnancy) to the app user. This is why you want the app user to select a due date or a last cycle date: so that the app can use that date to calculate the user's current week of pregnancy.
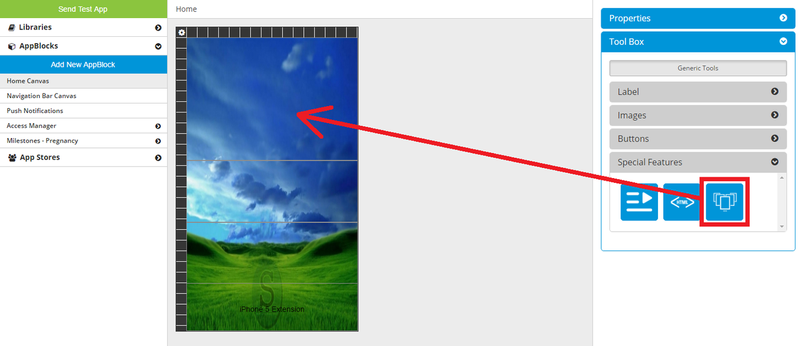
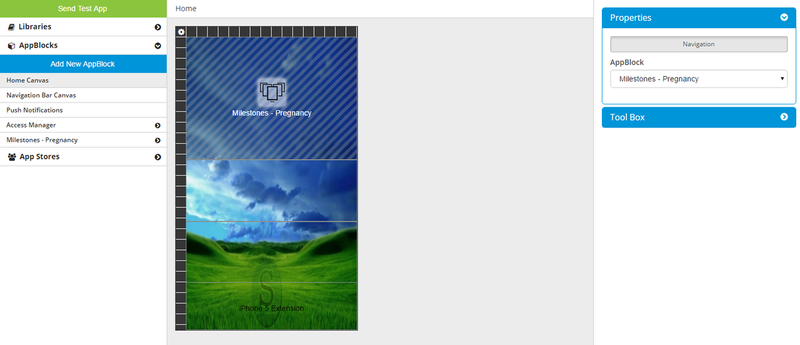
The Carousel must go on the Home canvas, so in the left-hand menu go to Home Canvas. Use the splitters to construct a space for the Carousel.
In the Tool Box on the right, open the Special Features drawer, grab the Carousel tool, and drag it onto the space you just created on the Home canvas.
Click on the Carousel, then in the Properties box on the right, select your Milestones AppBlock as the target.
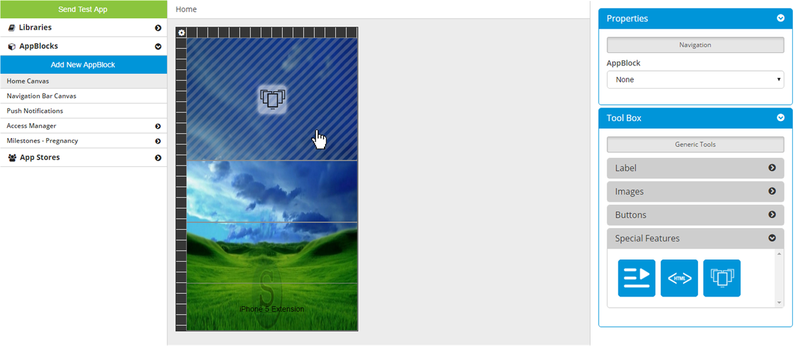
Now the Carousel on the Home canvas will show the name of the targeted AppBlock.
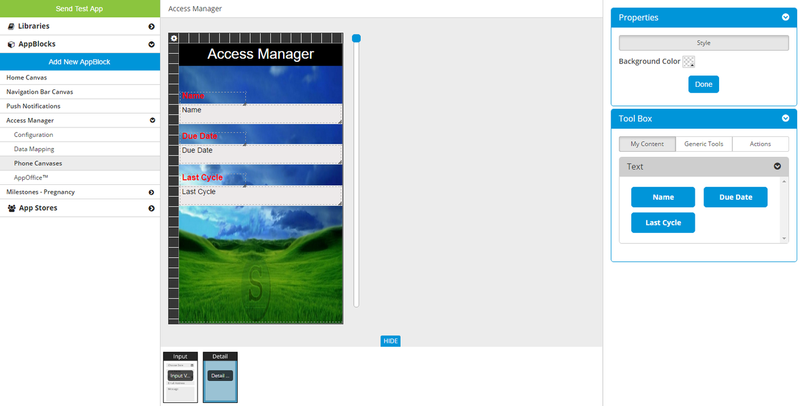
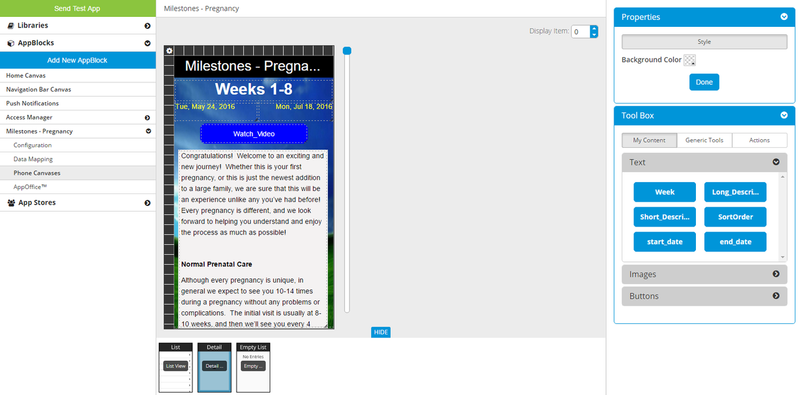
Now you need to design the Carousel canvas. In the left-hand menu, go to Milestones > Phone Canvases.
You will see that you now have two additional pages - "Carousel" and "Empty Carousel". Click on "Carousel".
On the Carousel canvas, drag fields from the Tool Box onto the canvas and then arrange them to your liking.

In the Properties box on the right, under the Style tab, you can set the Background Color.
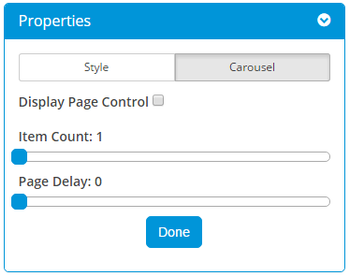
On the Carousel tab, you can configure the Carousel settings.
- Display Page Control refers to showing small navigation dots to indicate the total number of items - leave this unchecked for a pregnancy app.
- Page Delay refers to how long the Carousel waits before scrolling to the next item. For a pregnancy app, since you checked "Carousel View" under Content Publishing, there will only be 1 item active at a time, so you can ignore Page Delay.
- Item Count refers to how many items are displayed in the Carousel cycle. For a pregnancy app, again, since you checked "Carousel View" under Content Publishing, there will only be 1 item active at a time, so you can ignore Item Count.
You can ignore the Empty Carousel canvas for a pregnancy app.
The Empty Carousel will be displayed after the final milestone expires - for a pregnancy app, this would be after the baby is born . You can design the Empty Carousel canvas to show a congratulatory message.
![]()
Settings AppBlock
For any app that uses Registration, it's usually a good idea to include the Settings AppBlock. The app user can go to Settings if she wants to update her Registration info. For a pregnancy app, a common example may be that, when the app user first installs the app, she may know her last cycle date but not her due date. So she enters the last cycle date in the Last Cycle Date field and begins using the app. Later, she gets a due date from her doctor, and wants to use that date. In the app, she can go to the Settings AppBlock, and from there she can enter the due date in the Due Date field. When she submits with a new date, the app will recalculate the milestone dates based on the new date.
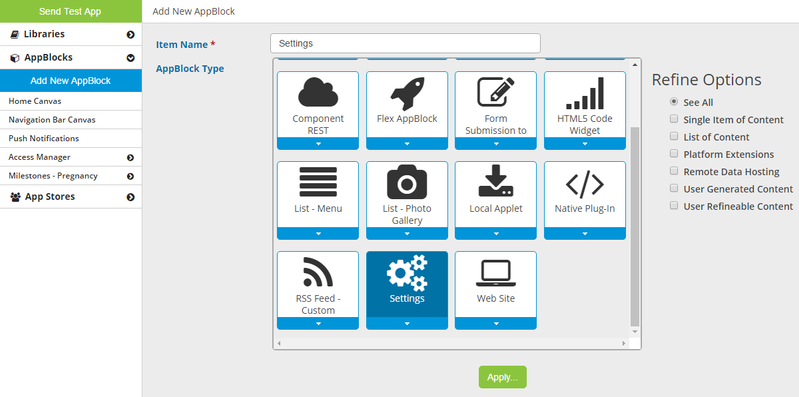
Click "Add New AppBlock". Enter a name for the AppBlock, such as "Settings", select the Settings AppBlock, and click "Apply".
Home Page
Finally, you need to give the app user a way to get to the Settings AppBlock and a way to get to the full list of milestones. There are multiple ways you can add a path to an AppBlock:
- Add a button to the Home page canvas and target the AppBlock.
- Add a row to a Menu List AppBlock and target the AppBlock.
- Add a tab (if your Navigation style is Tabs Only or Nav Bar & Tabs) and target the AppBlock.
- Add a row to your Fly-out Menu (if your Navigation style is Fly-out Menu) and target the AppBlock.
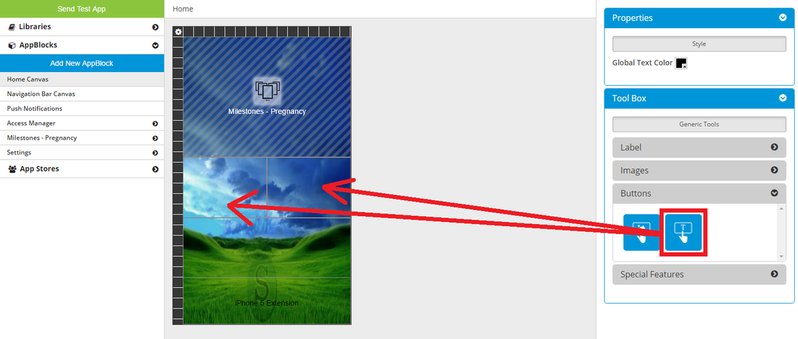
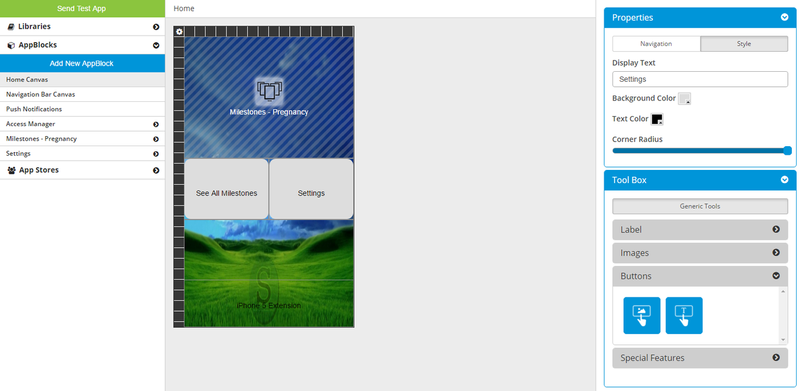
In this example, we'll add buttons to the Home page.
Use the splitters to create a space for each button.
In the Tool Box, open the Buttons drawer. Drag one of the button tools onto the canvas. (the one on the left lets you pick an image, the one on the right lets you enter text)
After you have dropped the button tool onto the canvas, click it. In the Properties box, on the Navigation tab, select the target AppBlock - the app user will be taken to this AppBlock when she taps this button. Select either your Settings AppBlock or your Milestones AppBlock.
Finally, In the Properties box, go to the Style tab and configure the button's display properties.
Now repeat the process for the other button.
You are now ready to try a test build! Click the green "Send Test App" button. In about 5 minutes, you will receive an email with a link to download your app!
Device Behavior
When the app user first launches the app, it will show the Registration input page.
![]()
Registration page on iPhone
If the user enters a date outside the acceptable range, it will show the validation message you specified.
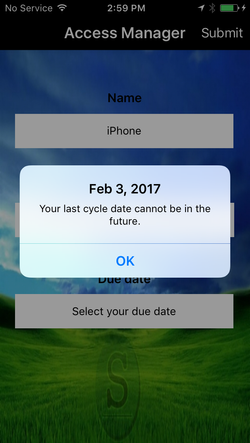
Validation error on iPhone
Once the user successfully submits the Registration page, the app will show the Home page. The carousel will show the current milestone (based on the reference date entered by the app user in Registration).
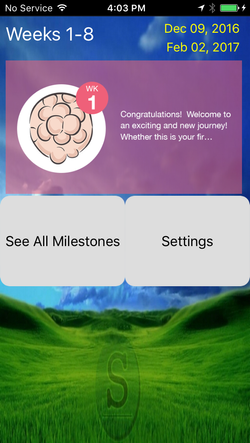
Home page on iPhone
If the user taps the "See All Milestones" button, she will be taken to the List View page of the Milestones AppBlock.
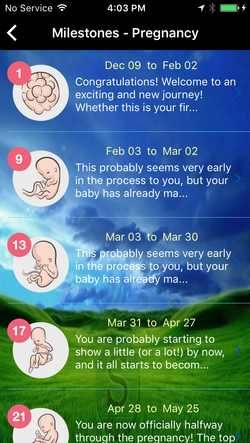
Milestones List View on iPhone
On the List View page, if the user taps a row, she will be taken to the Detail View page of that particular milestone. Another route to the Detail View page is by tapping the Carousel on the Home page, which will go to the Detail page of the current milestone.
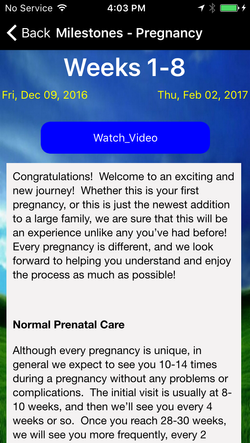
Milestones Detail View on iPhone
If the user wants to change her data (such as her due date), she can do so by going to the Settings AppBlock.
(If you don't like "Access Manager", you can change it by changing the Display Name of the AppBlock. In the platform, in the left-hand menu, go to AppBlocks > Access Manager > Configuration. Enter your desired text for the Display Name field and click "Apply".)
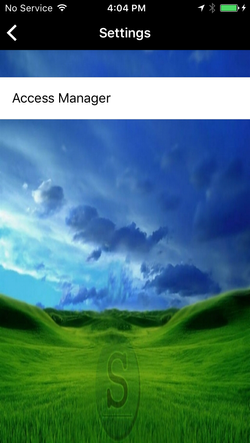
Settings on iPhone
The Detail View page of Registration shows the data entered by the user. She can tap "Edit" to update the data. If she changes either date, the app will recalculate all the milestones based on the new date(s).
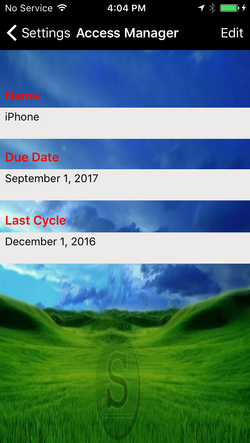
Registration Detail View on iPhone