Registration
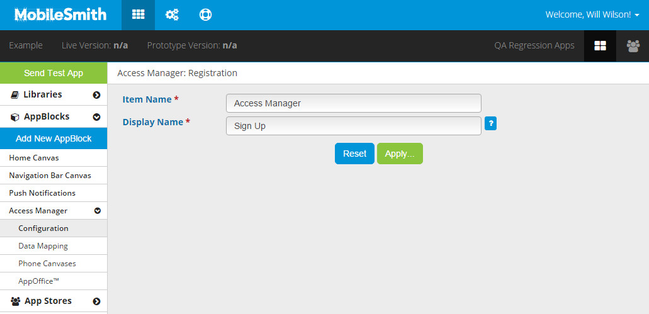
Configuration
On the Configuration page, you can set the Item Name and the Display Name. The Item Name is what you will see in the platform when designing your app. The Display Name is what will be showed to the app user when using the app. Both are set to "Access Manager" by default.
Data Mapping
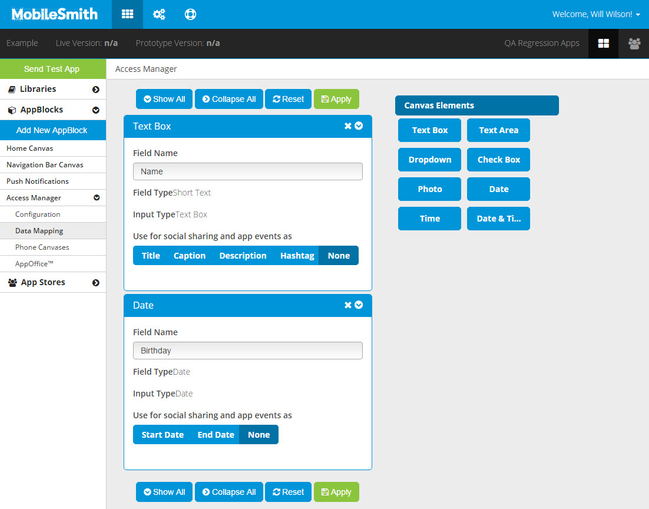
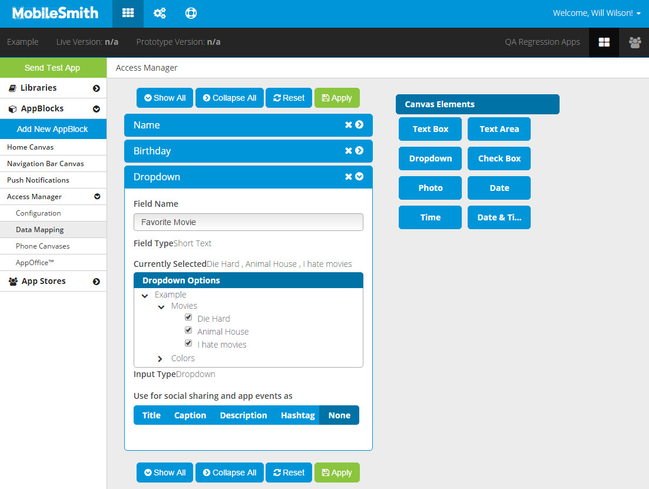
Go to Data Mapping to configure your input fields. Under "Canvas Elements" you will see all of the input types. Drag-and-drop the fields you want to the area left of Canvas Elements.
![]()
Once you have added an input field, you can set the field name and opt to use the field for social sharing.
Once you have added all the fields you want, click "Apply". You can always come back to Data Mapping and add more fields (or remove fields).
This video shows how to add your fields in Data Mapping:
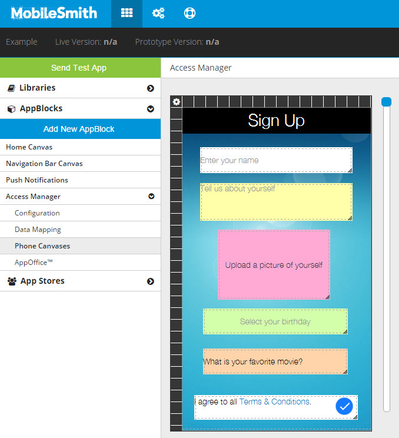
After adding all your input fields in Data Mapping, you need to design the canvas.
![]()
Phone Canvases
There will be an Input canvas where you can design the input page.
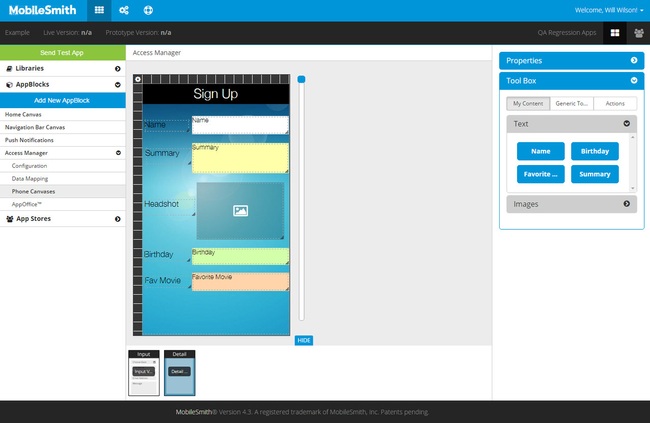
In the Tool Box, under the Generic Tools tab, you will see the standard canvas tools: Text Label, Image, Button w/ Image, Plain Button, Flyout Button, HTML Snippet.
In the Tool Box, under the Inputs tab, you will see the fields you added in Data Mapping. The input fields are divided into three drawers based on the input type:
- Text drawer
- Text Box
- Text Area
- Images drawer
- Photo
- Selectors drawer
- Dropdown
- Check Box
- Date
- Time
- Date & Time
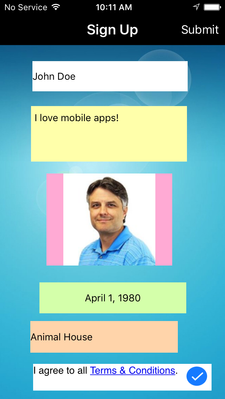
In addition to the fields you added in Data Mapping, you will see one called "Rich Text Label" in the Text drawer. One common use for this field type is to put a hyperlink to Terms & Conditions, and then add a Checkbox field:
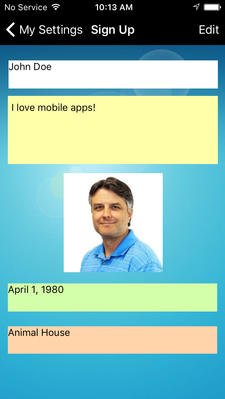
There is also a Detail canvas that can be used to show the data post-registration. Here, in the Tool Box, there will only be drawers for Text and Images. The input fields that fall under "Selectors" on the Input page are listed here under Text. The difference is because fields on a Detail canvas are display-only, while fields on an Input canvas are editable.
AppOffice
In the platform, you can go to AppOffice and see the data each user entered. You can edit and delete items.
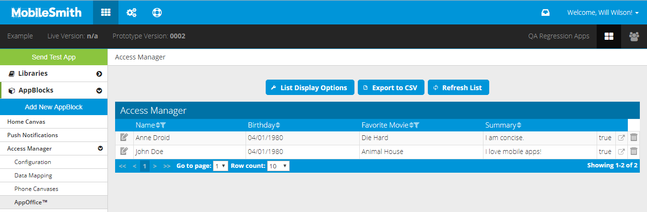
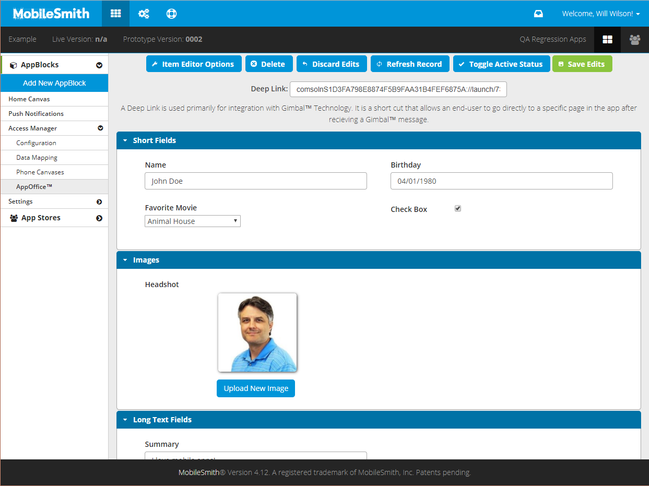
Each time an app user completes Registration, it adds a new row to this table in AppOffice. You can click the Edit button (pencil icon) on the left side of any row to edit the data.
If there is at least one item in the AppOffice table, you will not be able to change the Access Method.
Device Behavior
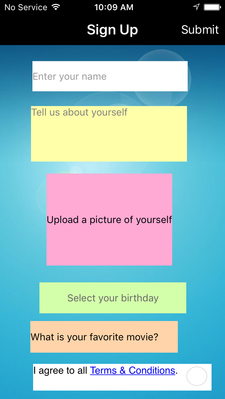
When the app user launches the app, it will come to the Registration page (the Input canvas), and each field will show the Placeholder Text.
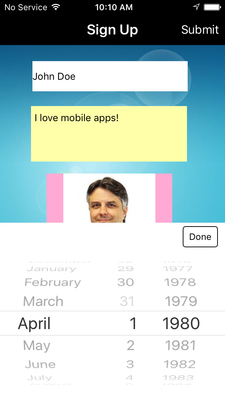
For Date fields, the app will use the device's default date-selection mechanism.
< < iPhone
Droid > >

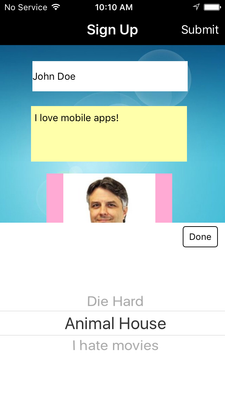
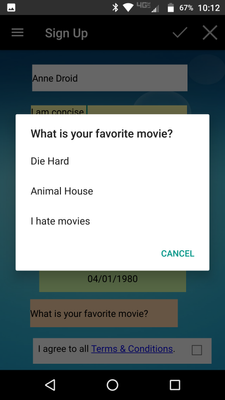
For Dropdown fields, the app will use the device's default option-selection mechanism.
< < iPhone
Droid > >
When the app user has completed the form, he can submit by tapping "Submit". At that point, all the data is sent to AppOffice.
Once the app user has completed Registration, it will no longer be displayed when the app is launched. If you include the Settings AppBlock, the app user can see what data he entered and update it if needed.