FastFill is a third-party software feature that allows an app user to fill out personal information fields by scanning an ID. This saves time and reduces “fat-finger” errors. In order to utilize this feature, you must have a merchant account with Jumio, the company behind FastFill. Click here to learn more.
**NOTE** Your MobileSmith account is completely separate from your Jumio account. You must contact Jumio to purchase a Jumio account.
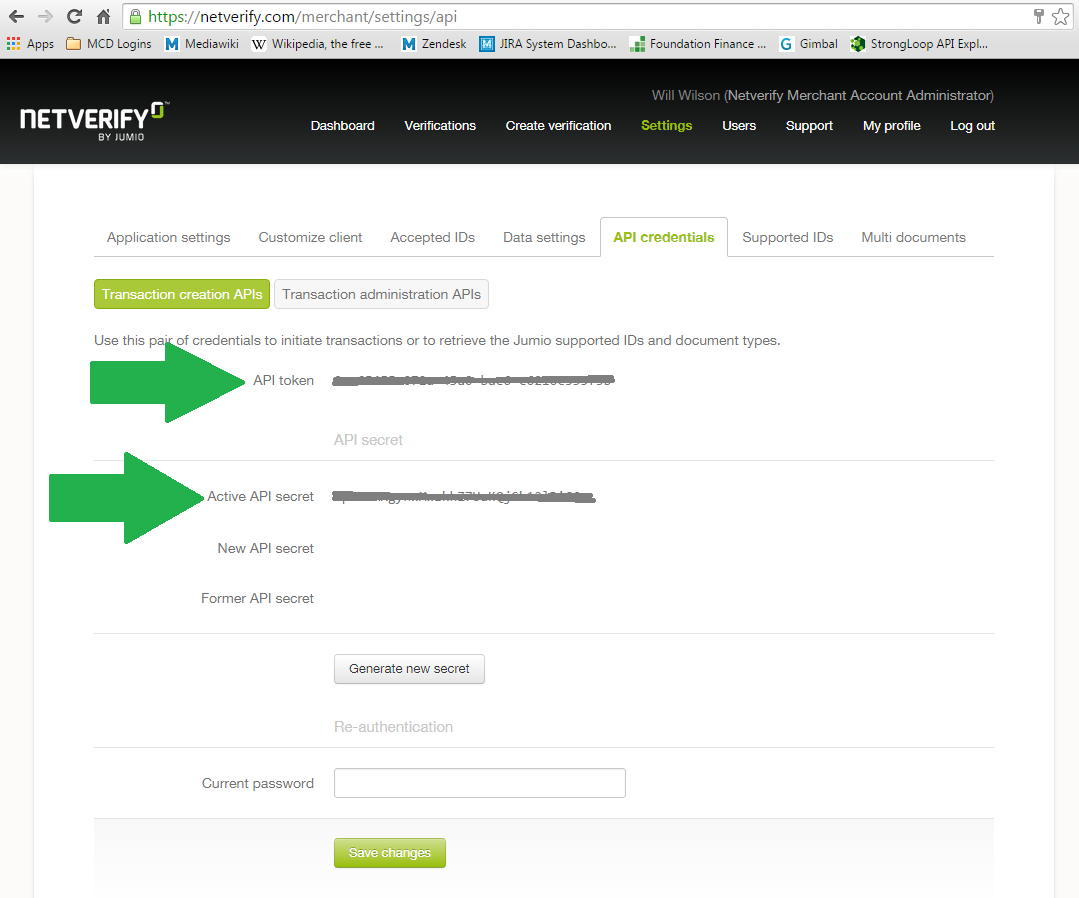
Once you have an active Jumio account, you can get the two pieces of information needed to utilize the FastFill feature in the MobileSmith platform: the token and the secret.
While logged in, go to Settings and then API Credentials. Find the “API token” and the “Active API secret”. Copy the values somewhere or leave that browser tab open.
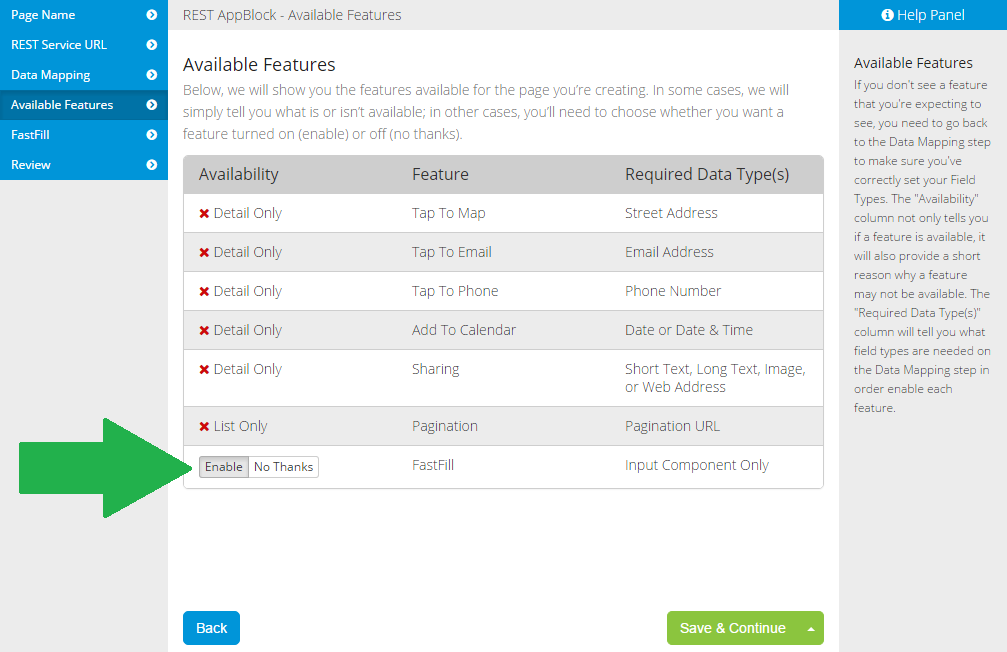
The FastFill feature can be used in a Component REST AppBlock. It is only available for Input components.
To activate the feature, you must choose “Enable” on the Available Features step of the REST Wizard.
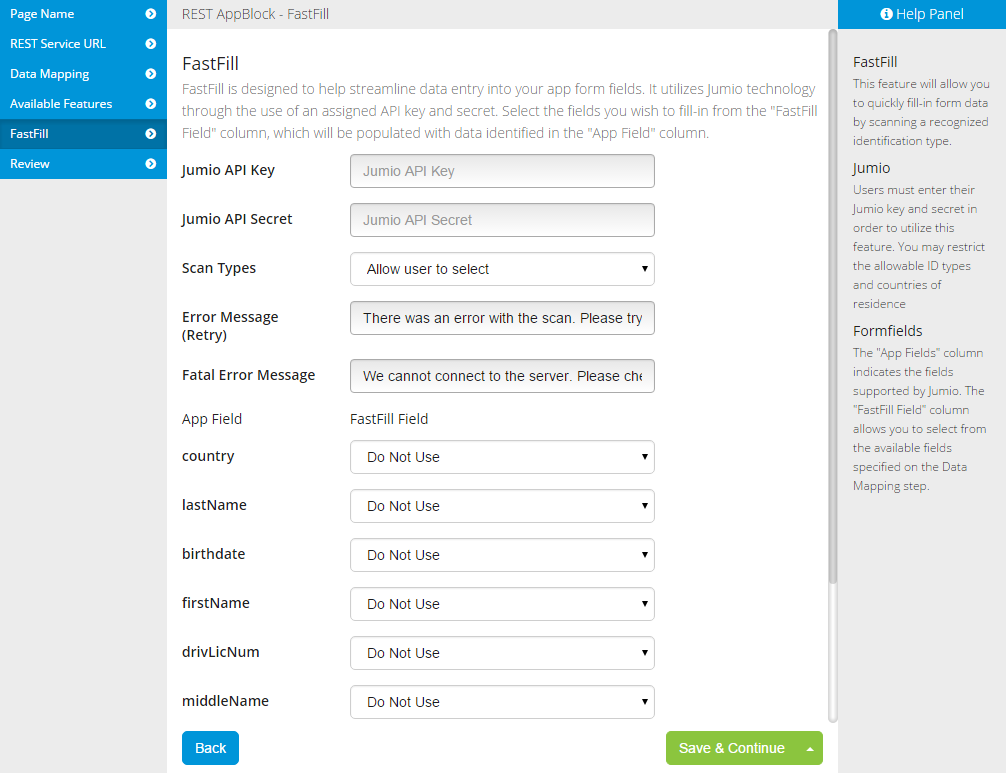
When the FastFill feature has been enabled, there will be a FastFill step in the REST wizard. That step is where you enter the token and secret from your Merchant Account.
Copy the “API token” value and paste it into the “Jumio API Key” field. Copy the “Active API secret” value and paste it into the “Jumio API Secret” field. Without these values, the FastFill feature will not work.
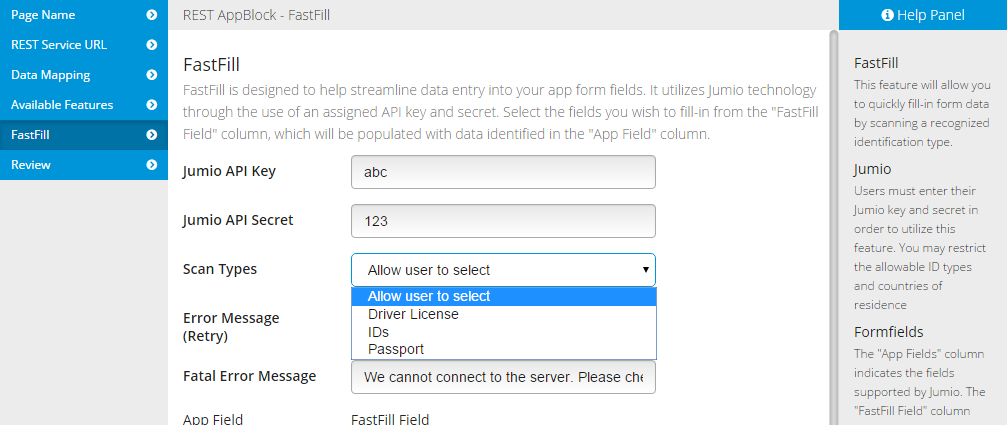
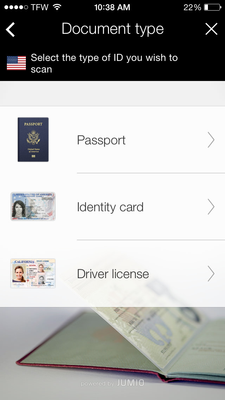
The FastFill feature allows the app user to scan three “document” types: passports, driver licenses, and identity cards.
On the FastFill step of the wizard, you can limit the user to a single type or you can let the user decide by choosing “Allow user to select”.
If you choose “Allow user to select”, the user will see the following screen (which will be skipped otherwise):
On the FastFill step of the wizard, you can customize the error message shown if the app user encounters an error. “Error Message” is shown if a scan does not work – for example, if the user tries to scan a credit card or some other “document” type besides passport, driver license, or identity card. “Fatal Error Message” is shown if the app cannot contact the FastFill server – for example, if the user’s phone loses its connection. A standard message is provided by default for both errors.
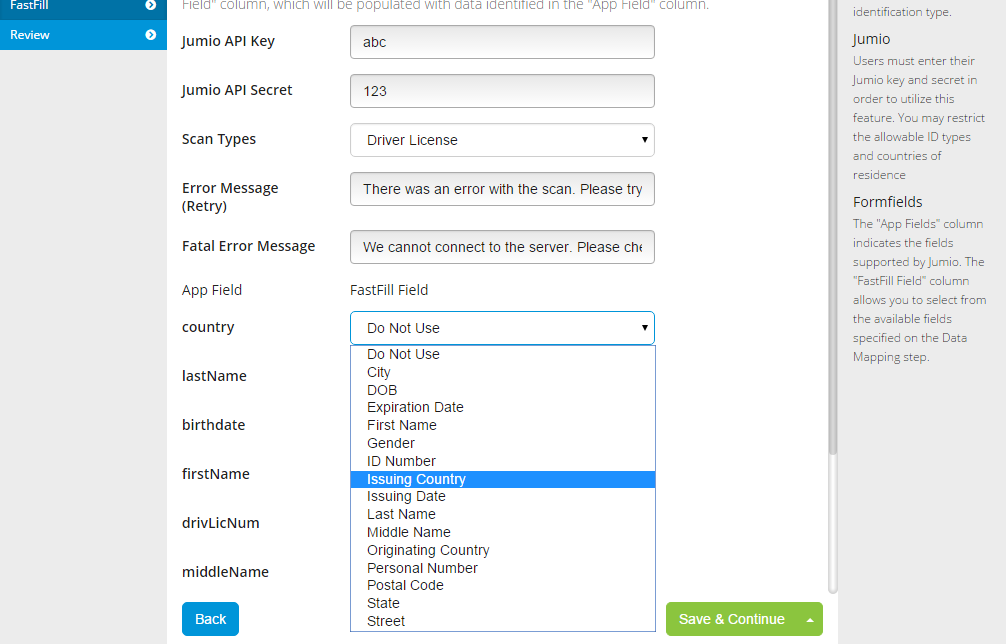
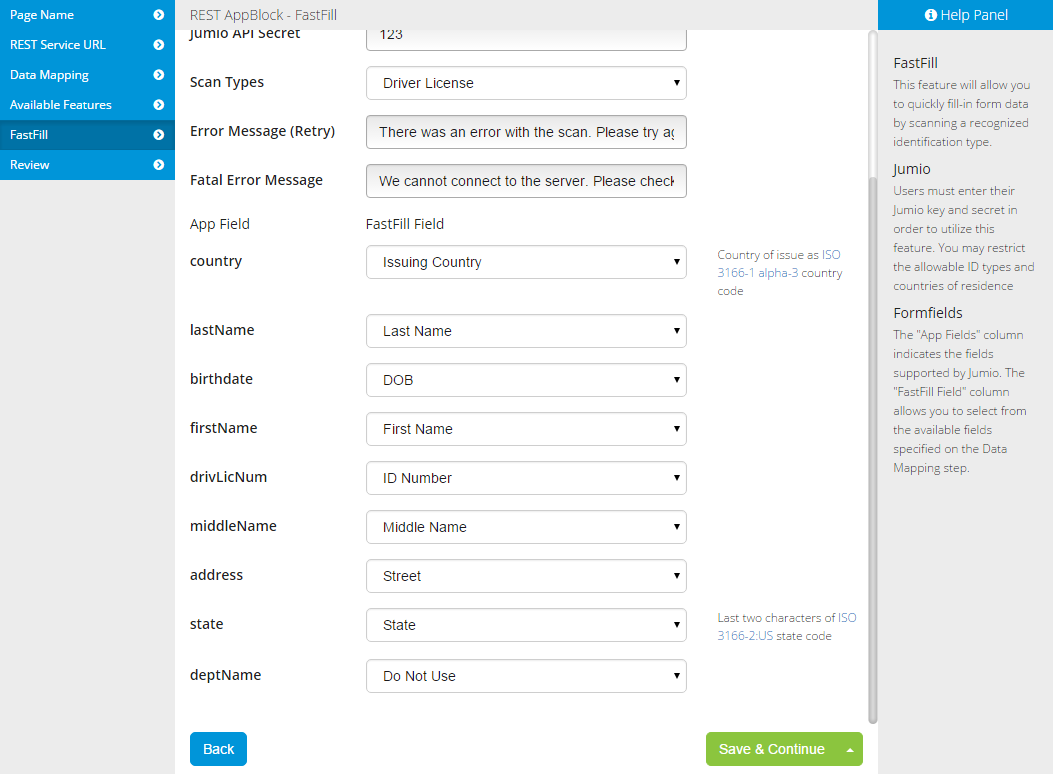
The last part of the FastFill wizard step is where you match up the FastFill fields to your own input fields. When FastFill does a scan, it extracts the following fields:
City
DOB (date of birth)
Expiration Date
First Name
Gender
ID Number
Issuing Country (the format will be the ISO 3166-1 alpha-3 country code, such as “USA”)
Issuing Date
Last Name
Middle Name
Originating Country (the format will be the ISO 3166-1 alpha-3 country code, such as “USA”)
Personal Number
Postal Code
State (the format will be the last two characters of the ISO 3166-2:US state code, such as “NC”)
Street
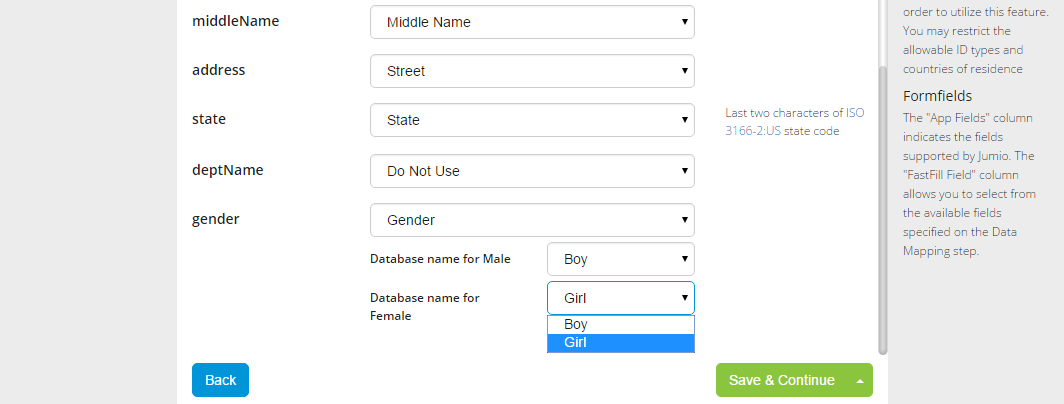
These are the fields you can use to populate your input fields. On the FastFill wizard step, you will see a list of the input fields* you configured on the Data Mapping step of the wizard. For each input field, you can select a FastFill field that will populate the input field.
*You can only use fields with the following Input Types: Text Box, Text Area, Dropdown, Date
For an input field that you do not want populated with a FastFill field, just leave it set to “Do Not Use” – this just means that the app user will have to manually enter data in that field.
In this example, the “deptName” field is set to “Do Not Use” and thus will not be populated by the FastFill feature.
Gender is a unique FastFill field in the MobileSmith platform. Because there is not a standardized format for representing gender (like there is for countries with ISO 3166-1), the platform allows you to specify how the gender is transmitted to your REST server. For example, some servers may represent gender as “m” and “f”, while others may use “man” and “woman”, while still others use “XY” and “XX”, etc.
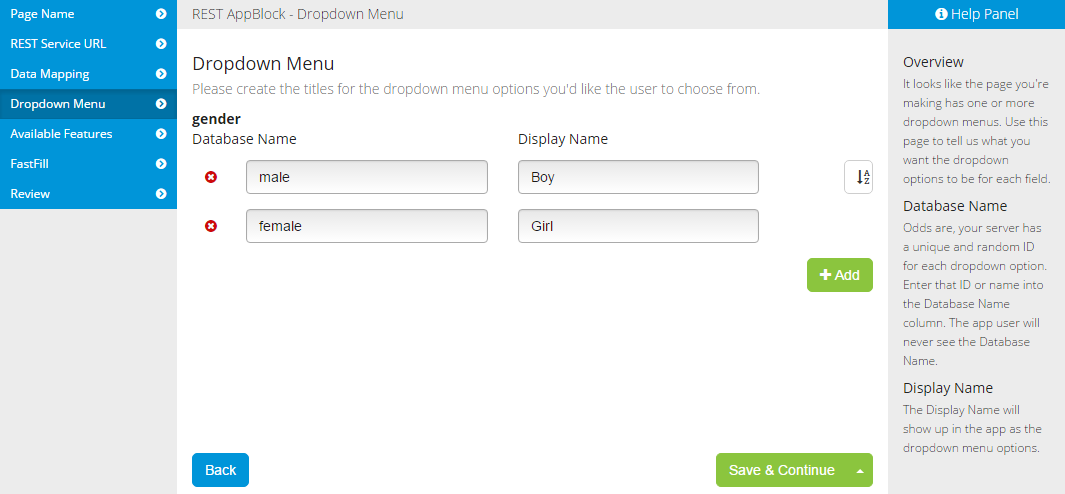
If you have an input field for gender, we recommend using “Dropdown” as the Input Type. If you do this on the Data Mapping step of the wizard, you will then have a “Dropdown Menu” step in the wizard. On that step, you can specify the Database Name of each option, which is what will get sent to the server when the app user submits, and you can specify the Display Name of each option, which is what the app user will see in the app. In this example, the app user would see a dropdown with two options: “Boy” and “Girl”. If the app user selects “Boy”, the app will send “male” to the REST server as the value of the gender field.
On the FastFill step of the wizard, if you assign the FastFill field “Gender” to an input field set to “Dropdown”, you can then tell the app which of your options applies to Male and which applies to Female.
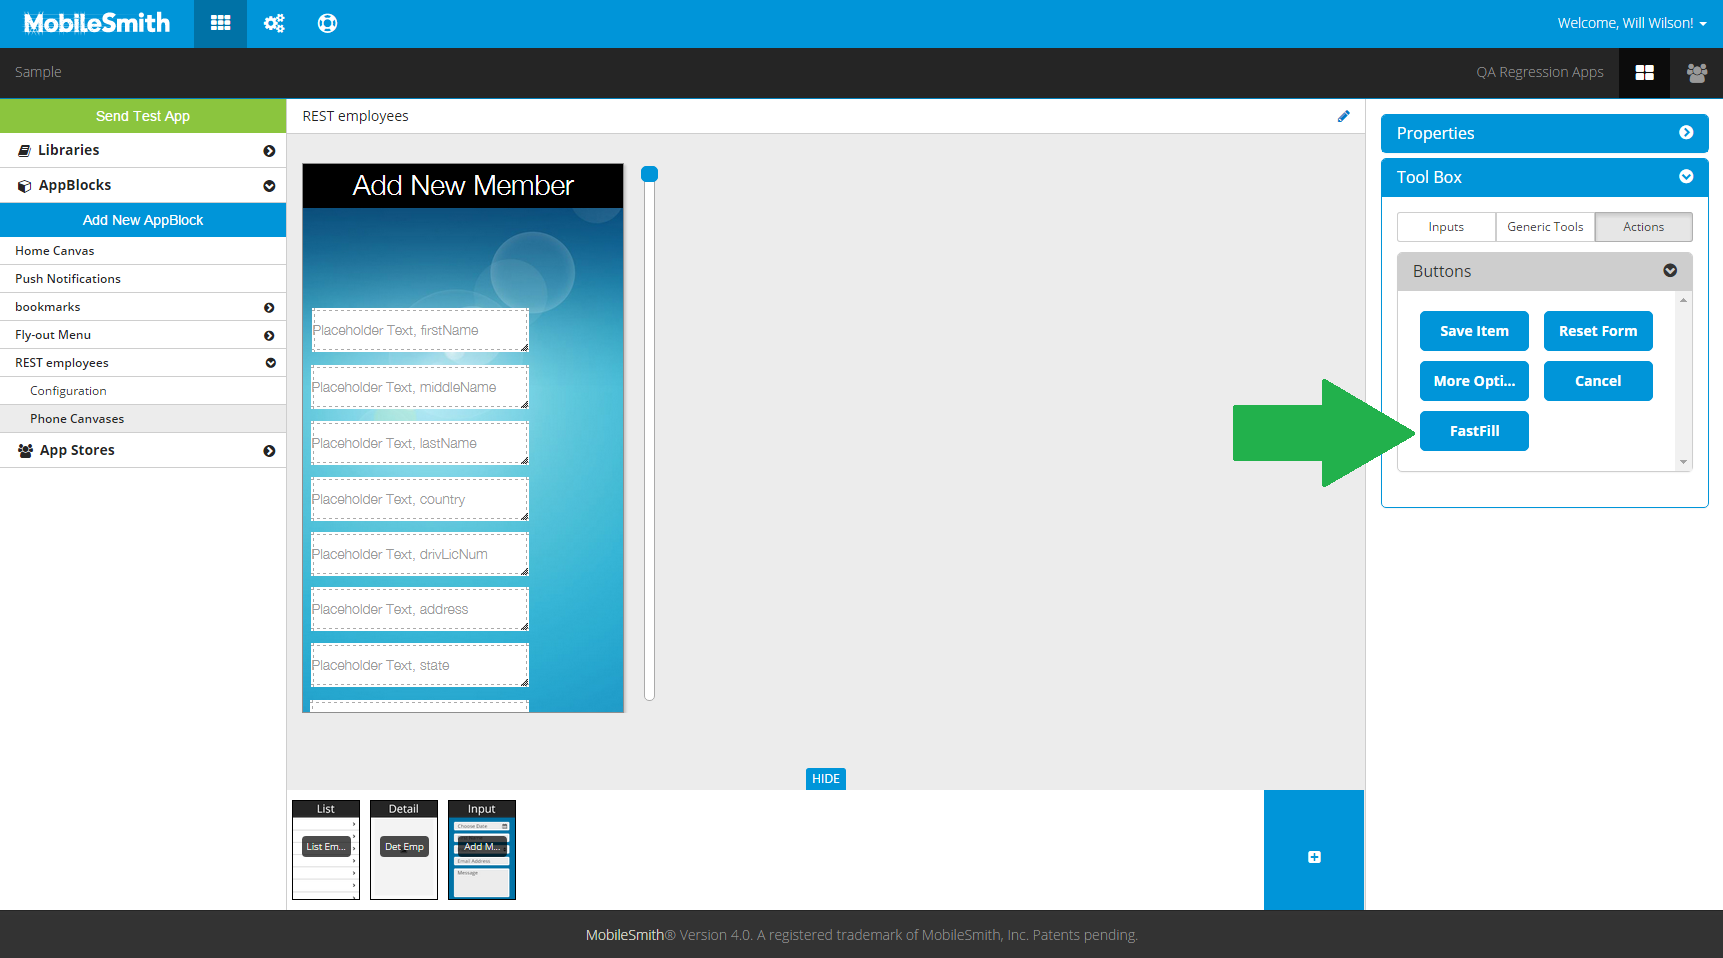
After you complete the wizard, you can configure your canvas. Just like any other Input component, your input fields are in the “Inputs” tab of your Tool Box and you can drag them onto the canvas and configure them. The “Actions” tab of your Tool Box will have a "FastFill” action button, which you can drag onto the canvas or navbar.
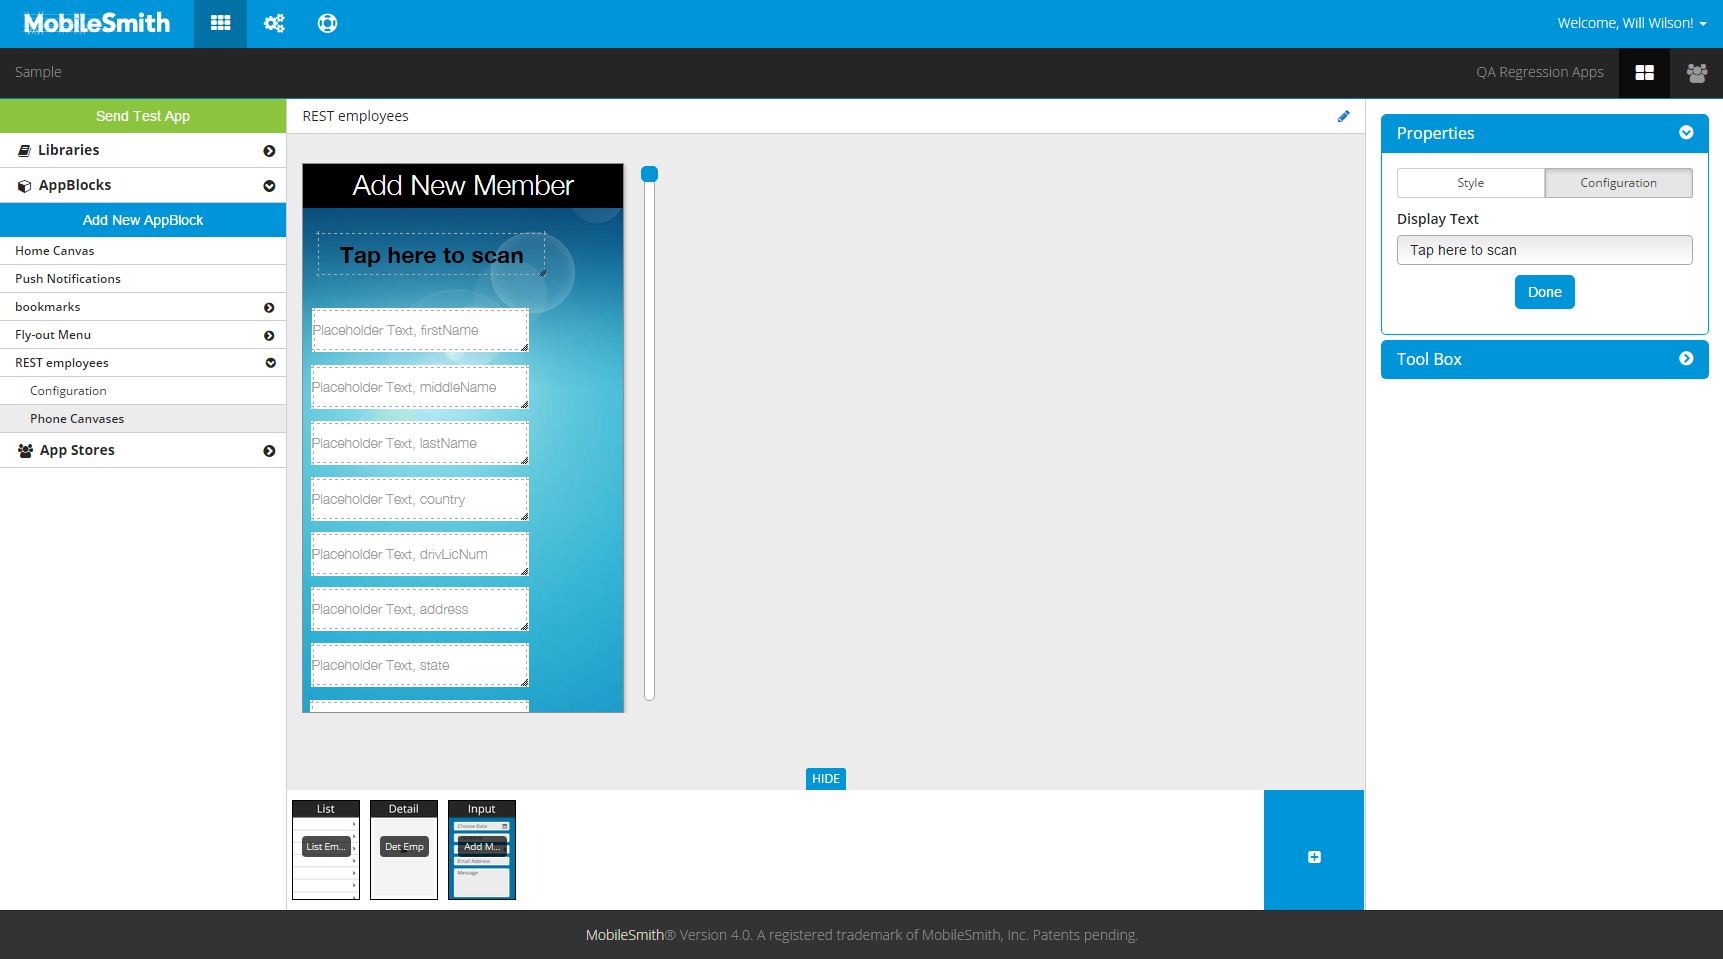
If you put the FastFill button on the canvas, you can configure it as simply text,
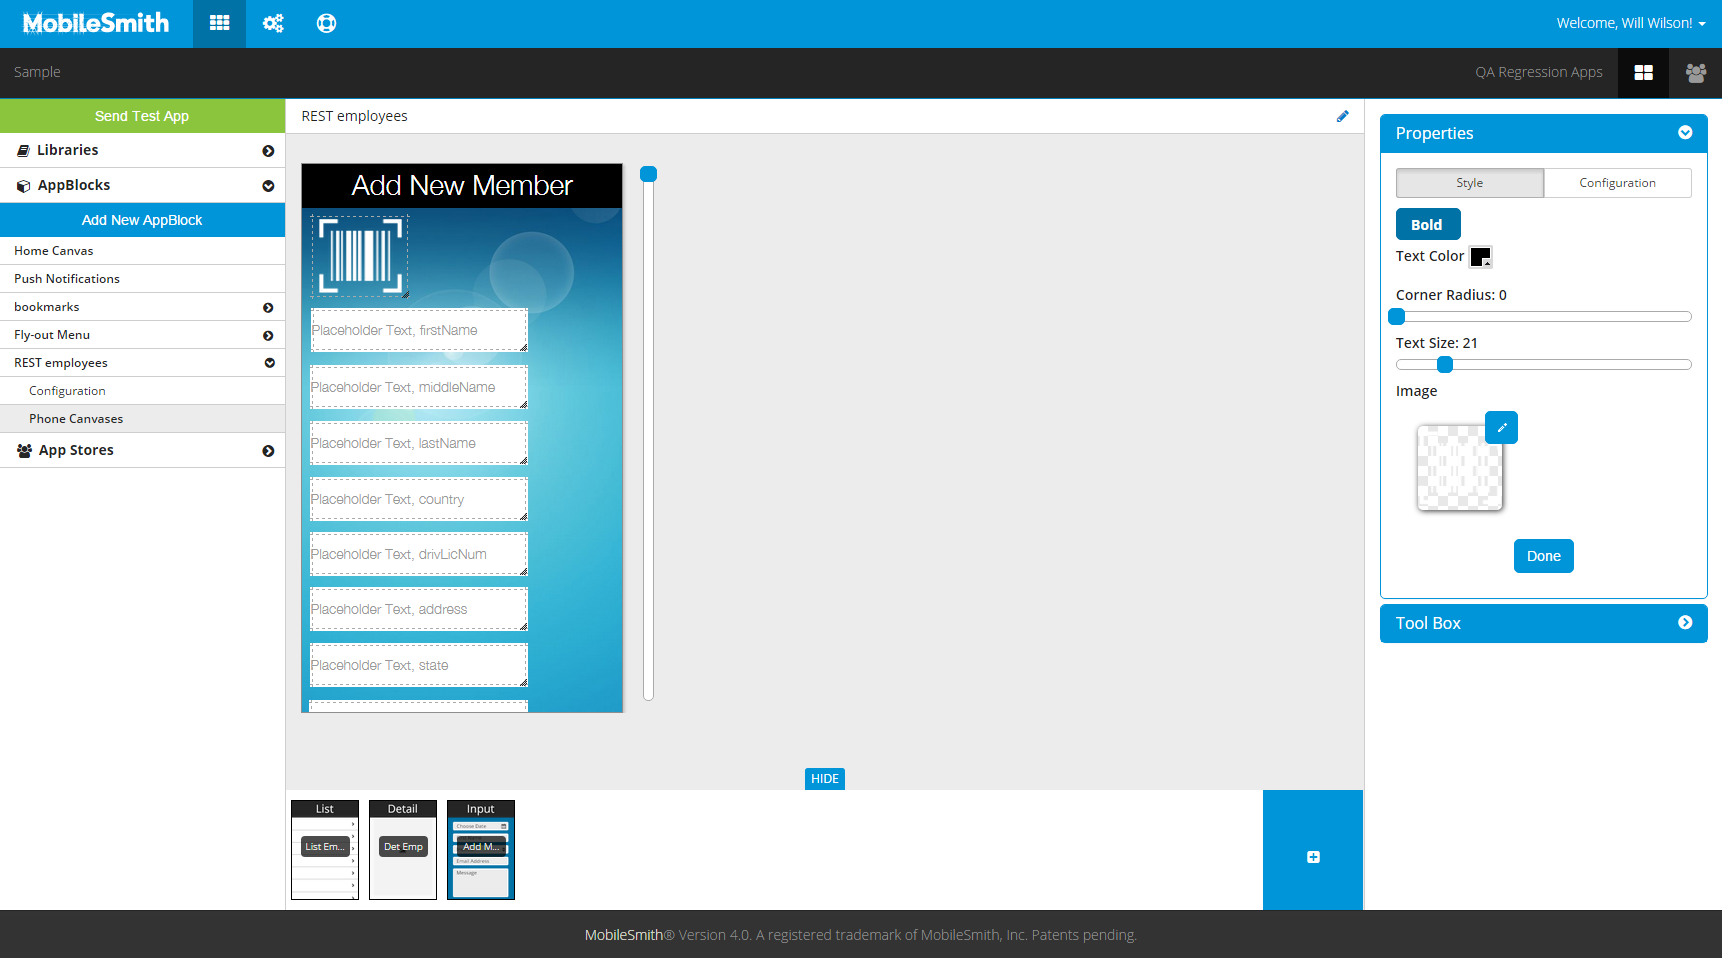
Or you could select an image from your Image Library (or upload a new image).
You could also put the FastFill button in the navbar and use the default “scan” icon:
![]()
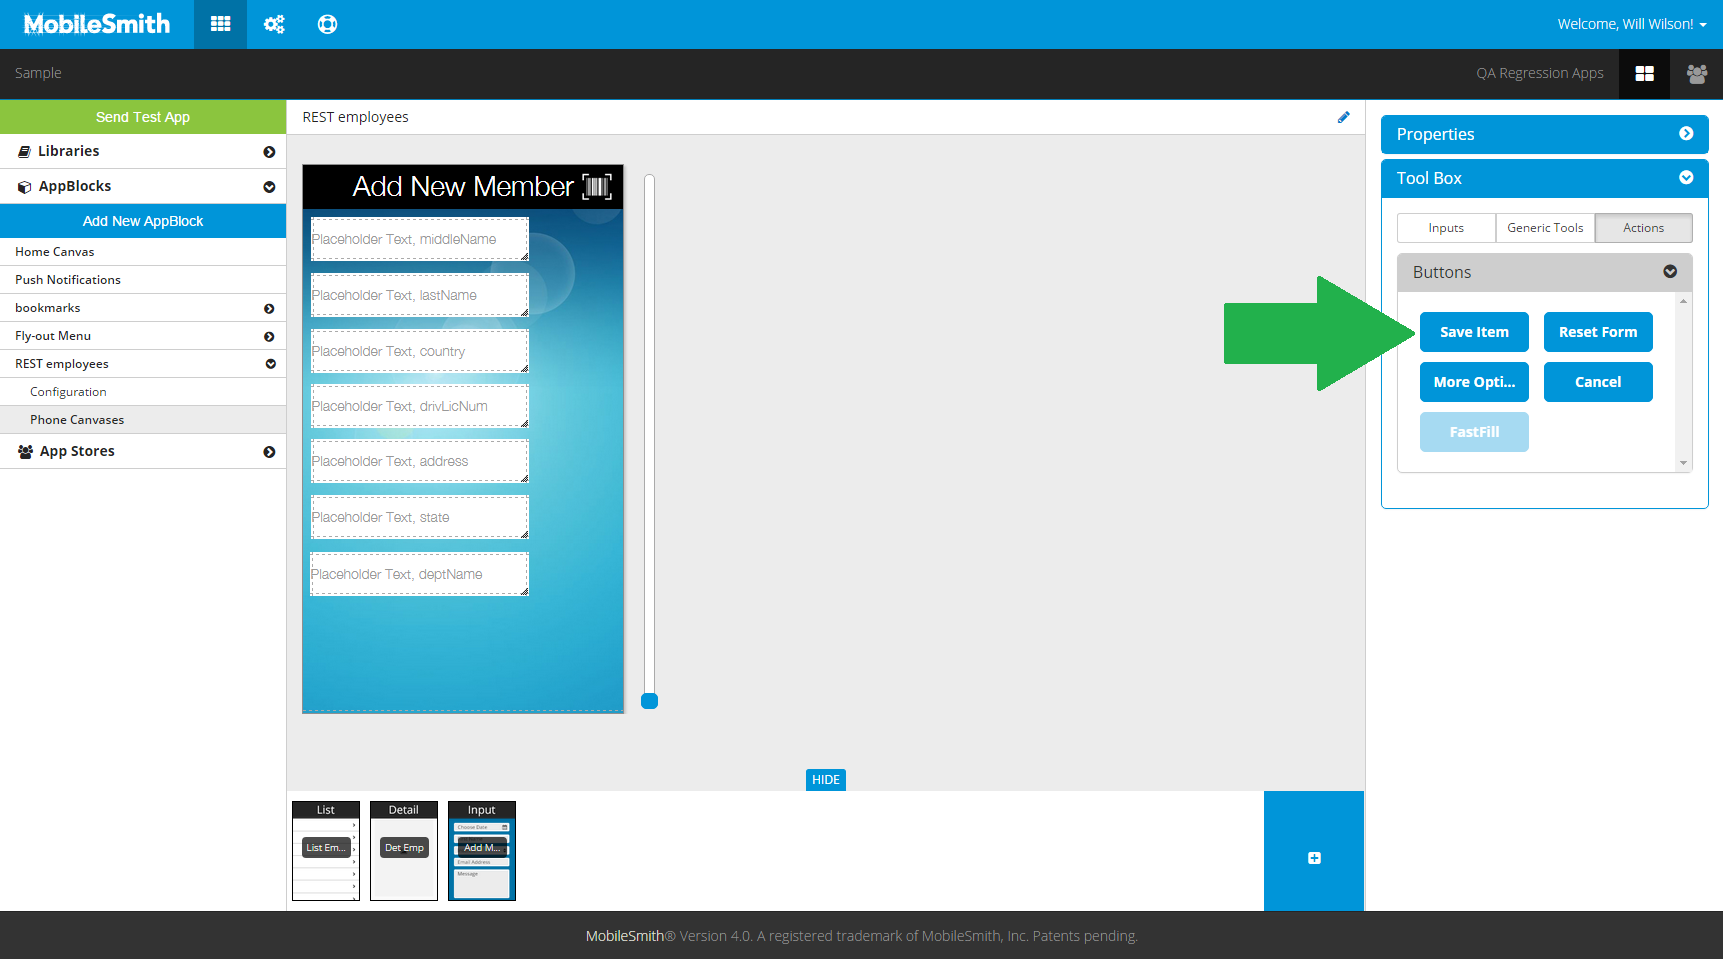
Finally, don’t forget to add the “Save Item” action button! When the app user taps this button, it will submit the form.
Now let’s see what it would look like on the device. When the user comes to the input page, it will show the input fields. For a POST (adding a new item), it will show the Placeholder Text for all fields. For a PUT (updating an existing item), it will show the existing data for all fields.
This screenshot is for a POST:
At this point, the user could manually enter data into each field, or he could tap the scan icon, which launches the FastFill feature.

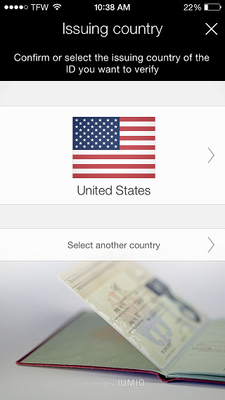
In the FastFill feature, the user first chooses the country (of the document to be scanned) – the default country is always USA.
If you selected “Allow user to select” for the Scan Types field on the FastFill step of the wizard, the user would now choose the type of document to be scanned – passport, driver license, or identity card. Once the user chooses the document type, he is taken to the scan function.
If you selected one of the document types for the Scan Types field, this step is skipped and the user is taken to the scan function immediately after choosing the country.

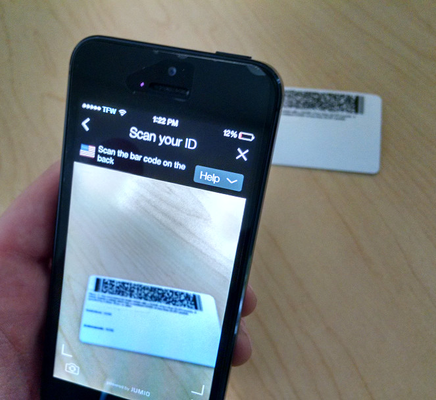
The scan function of the FastFill feature uses the phone’s camera to scan the bar code on the back of the document.
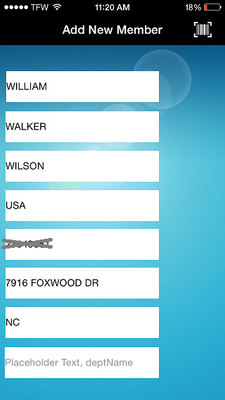
Once the scan is complete, the app returns to the input page, and now the input fields are populated with the data extracted from the scanned document.
In this example, the deptName field was set to “Do Not Use” in the FastFill step of the wizard, so it is unaffected by the scan. The user will have to manually enter data in that field.
The user also has the ability to edit fields that have been populated by FastFill – for example, the user’s driver license could contain an old address.
Once the user has finished entering data (by scan, manually, or both) he would tap the Save button, just like any other input page.
Related articles
Related articles appear here based on the labels you select. Click to edit the macro and add or change labels.
|