OAuth with Instagram
Let's take a look at how you would setup OAuth with Instagram.
Step-by-step guide
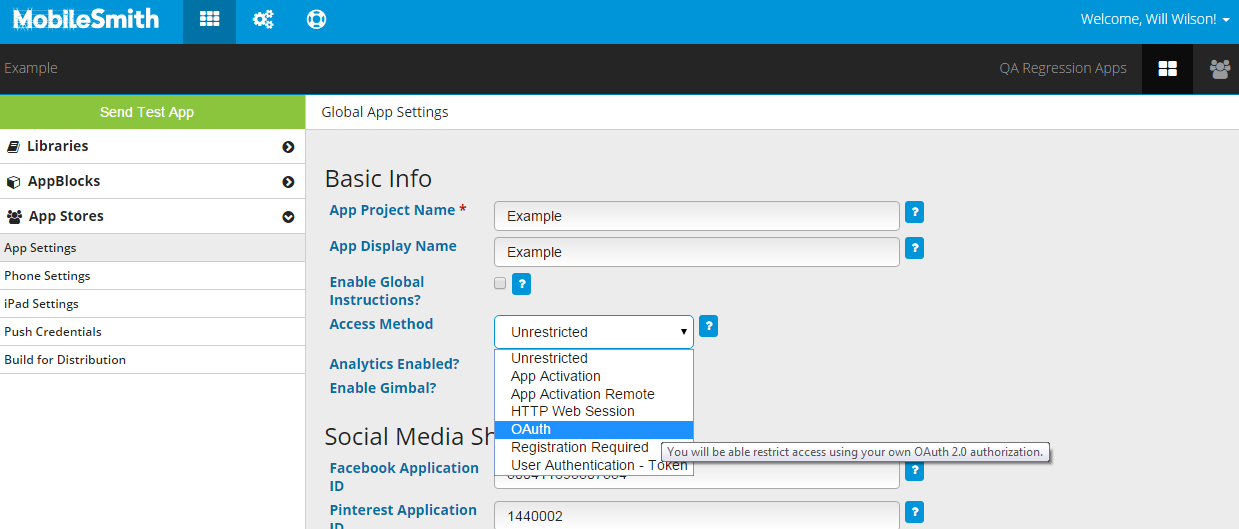
1. Enable OAuth as the Access Method.
- In the MobileSmith platform, go to your app project.
- Open the App Stores menu.
- Click “App Settings”.
- Open the Access Method dropdown and select “OAuth”.
- Click “Apply”.
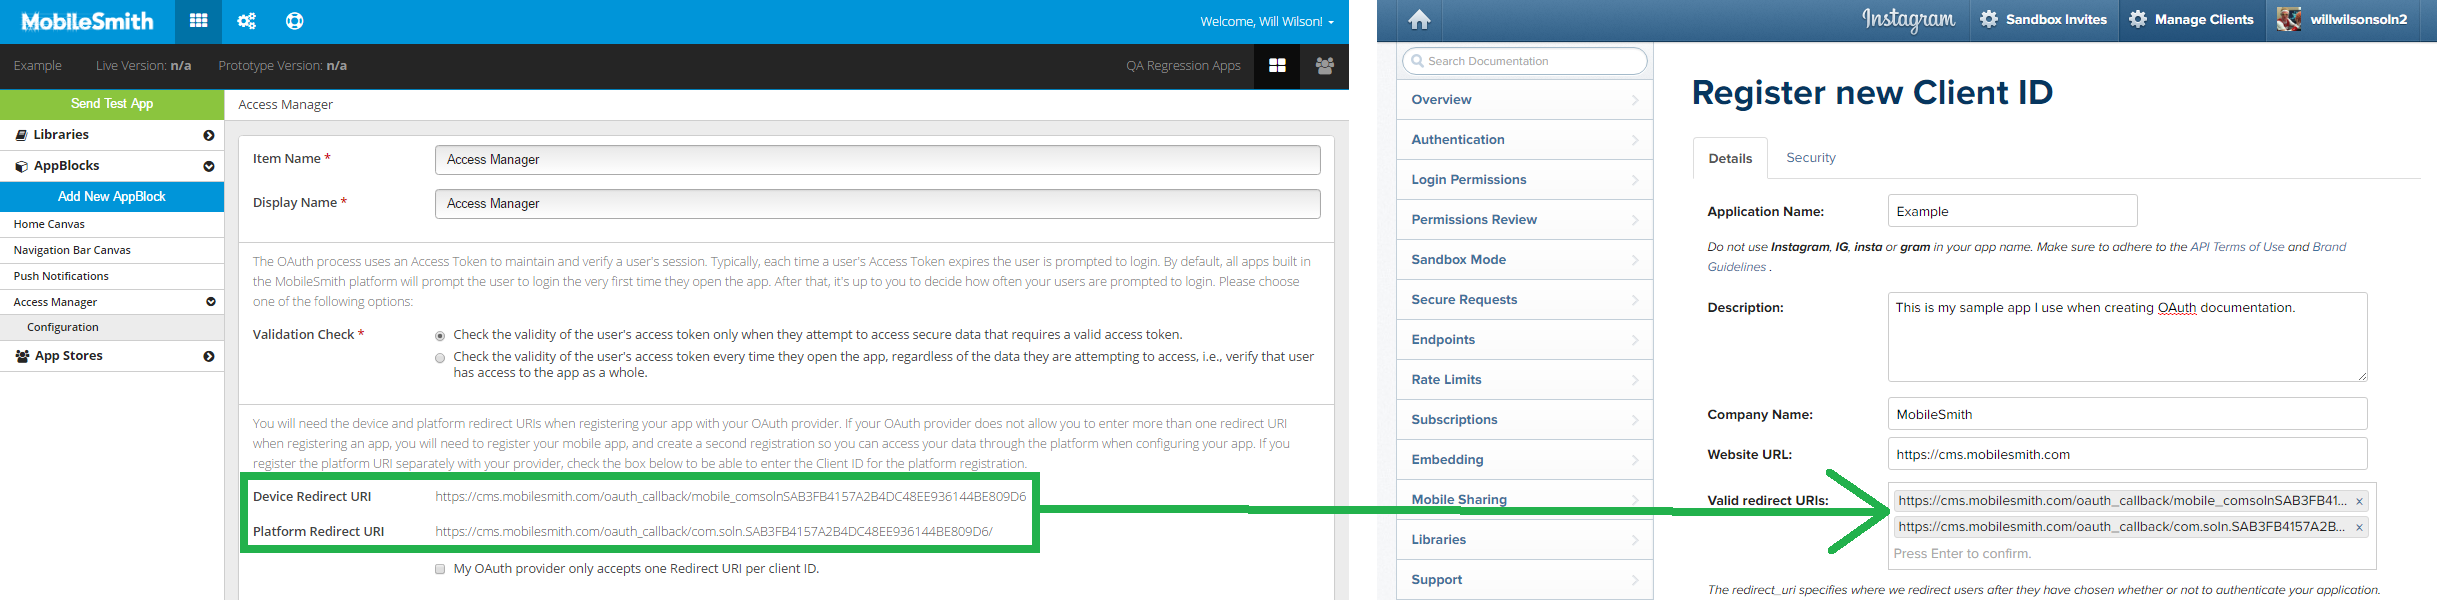
2. Obtain the two ‘Redirect URI’ fields.
- In the MobileSmith platform, go to your app project.
- Open the AppBlocks menu.
- Click “Access Manager”.
- Under “Access Manager”, click “Configuration”.
- You will see a ‘Device Redirect URI’ and a ‘Platform Redirect URI’. Copy and paste these into a document or simply leave the browser tab open.

3. Register the app with your OAuth Provider.
- Go to https://instagram.com/developer
- Login with your Instagram credentials.
- Click “Register Your Application”.
- Instagram accepts multiple Redirect URIs per client, so you can enter both of them in the ‘Valid redirect URIs’ field.
- Fill out the rest of the fields and click “Register”.
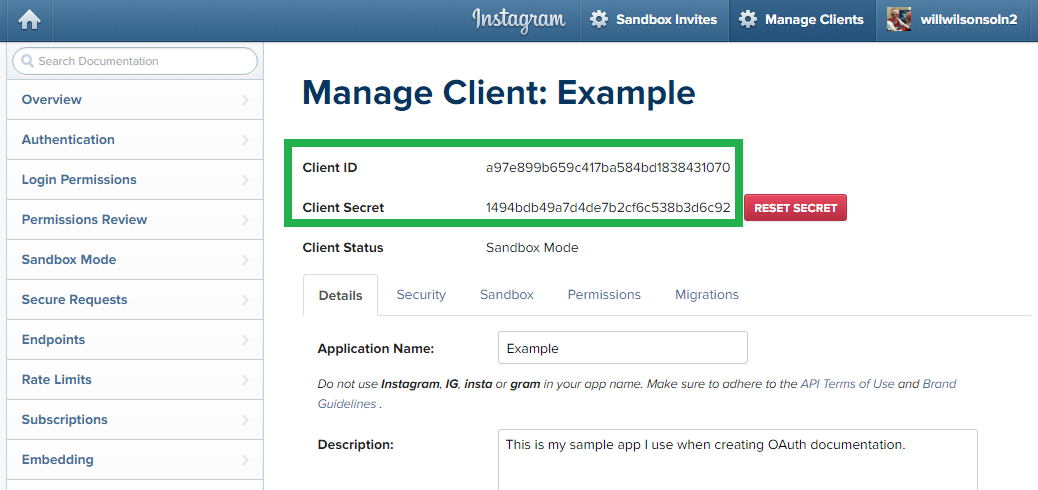
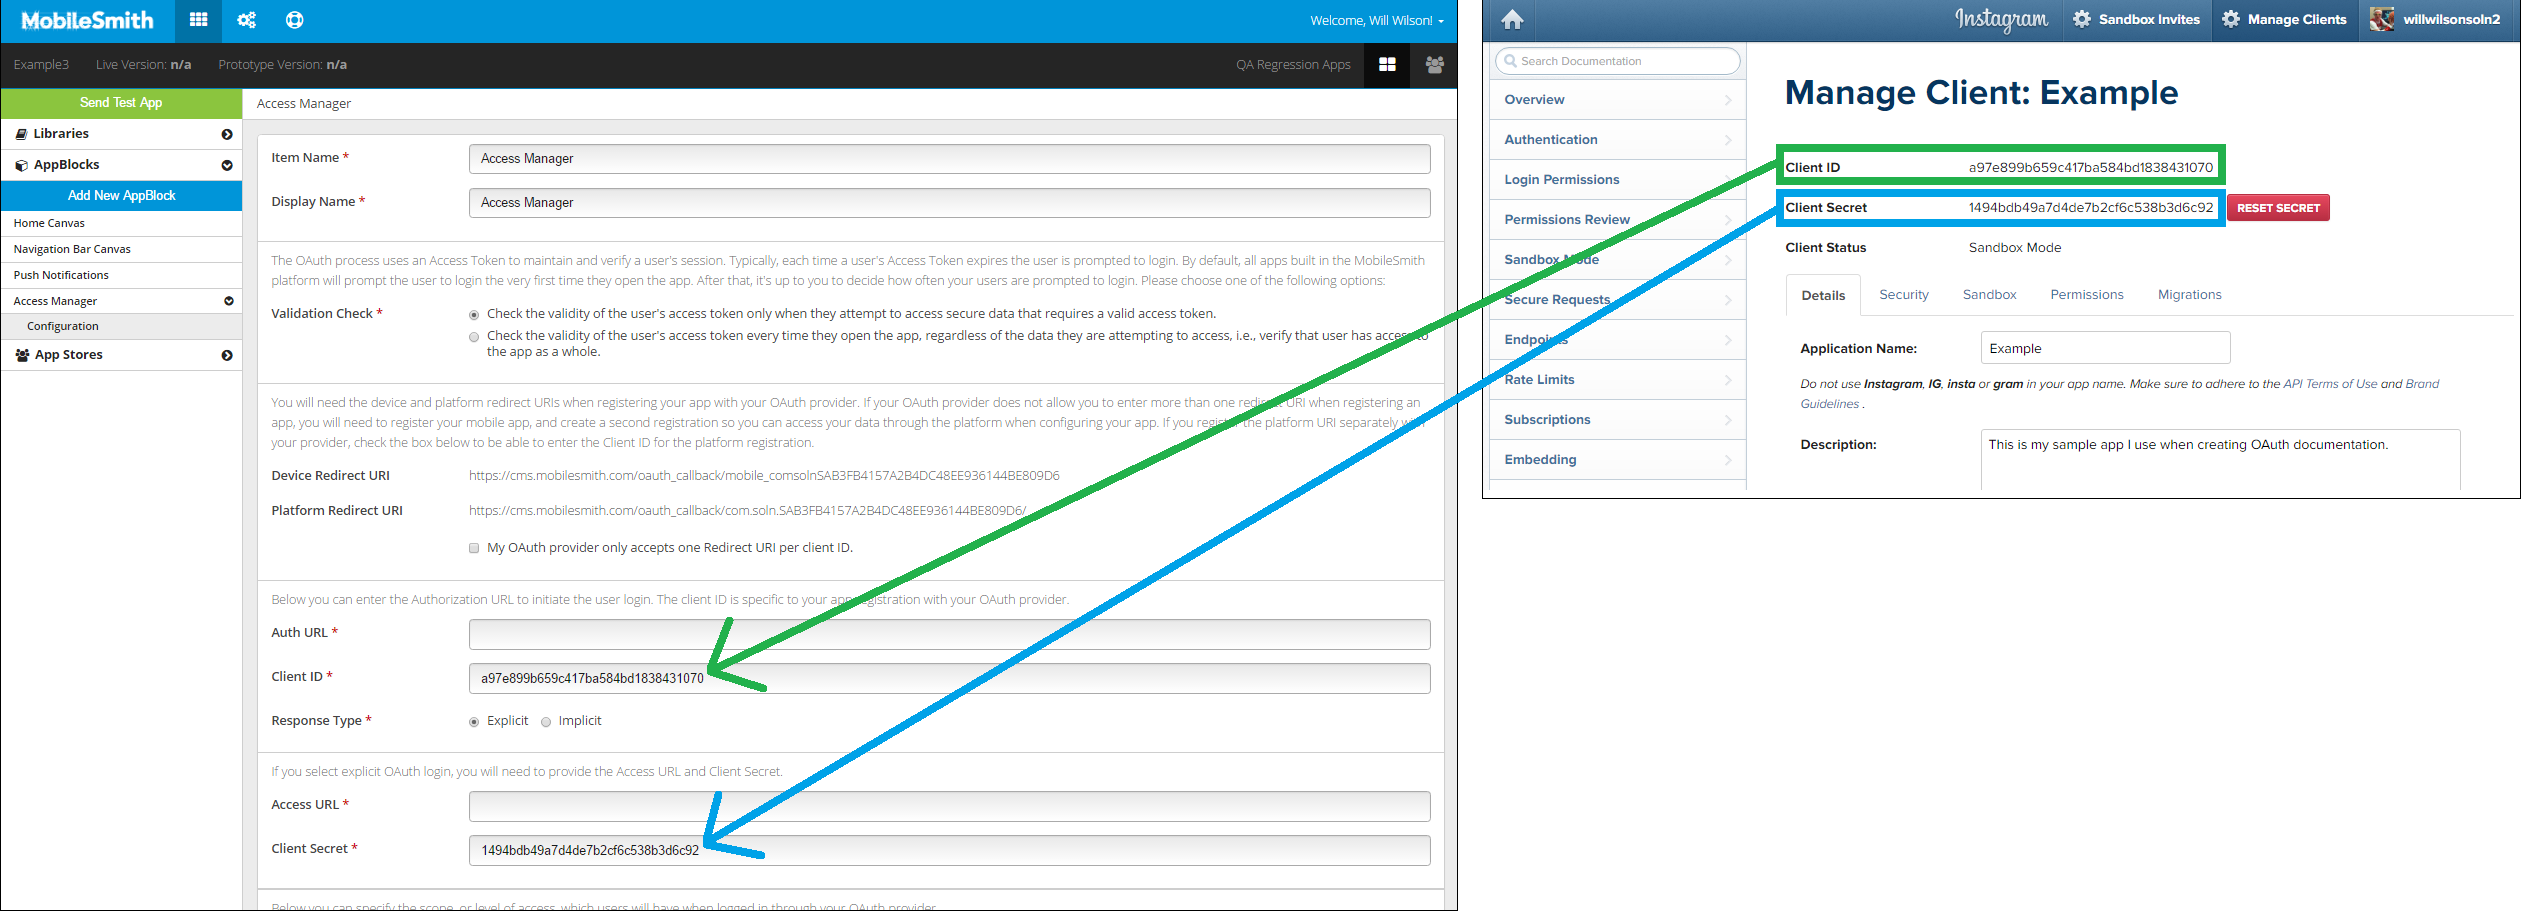
4. Find the Client ID and Client Secret
- In the Instagram site, find your app and click “Manage”.
- Find your Client ID. Copy and paste into a document or simply leave the browser tab open.
- Find your Client Secret. Copy and paste into a document or simply leave the browser tab open.
5. Indicate whether or not your provider accepts multiple Redirect URIs.
- In the MobileSmith platform, go to your app project.
- Go to AppBlocks > Access Manager > Configuration.
- Since Instagram accepts multiple Redirect URIs, do not check the “My OAuth provider only accepts one Redirect URI per client” checkbox.
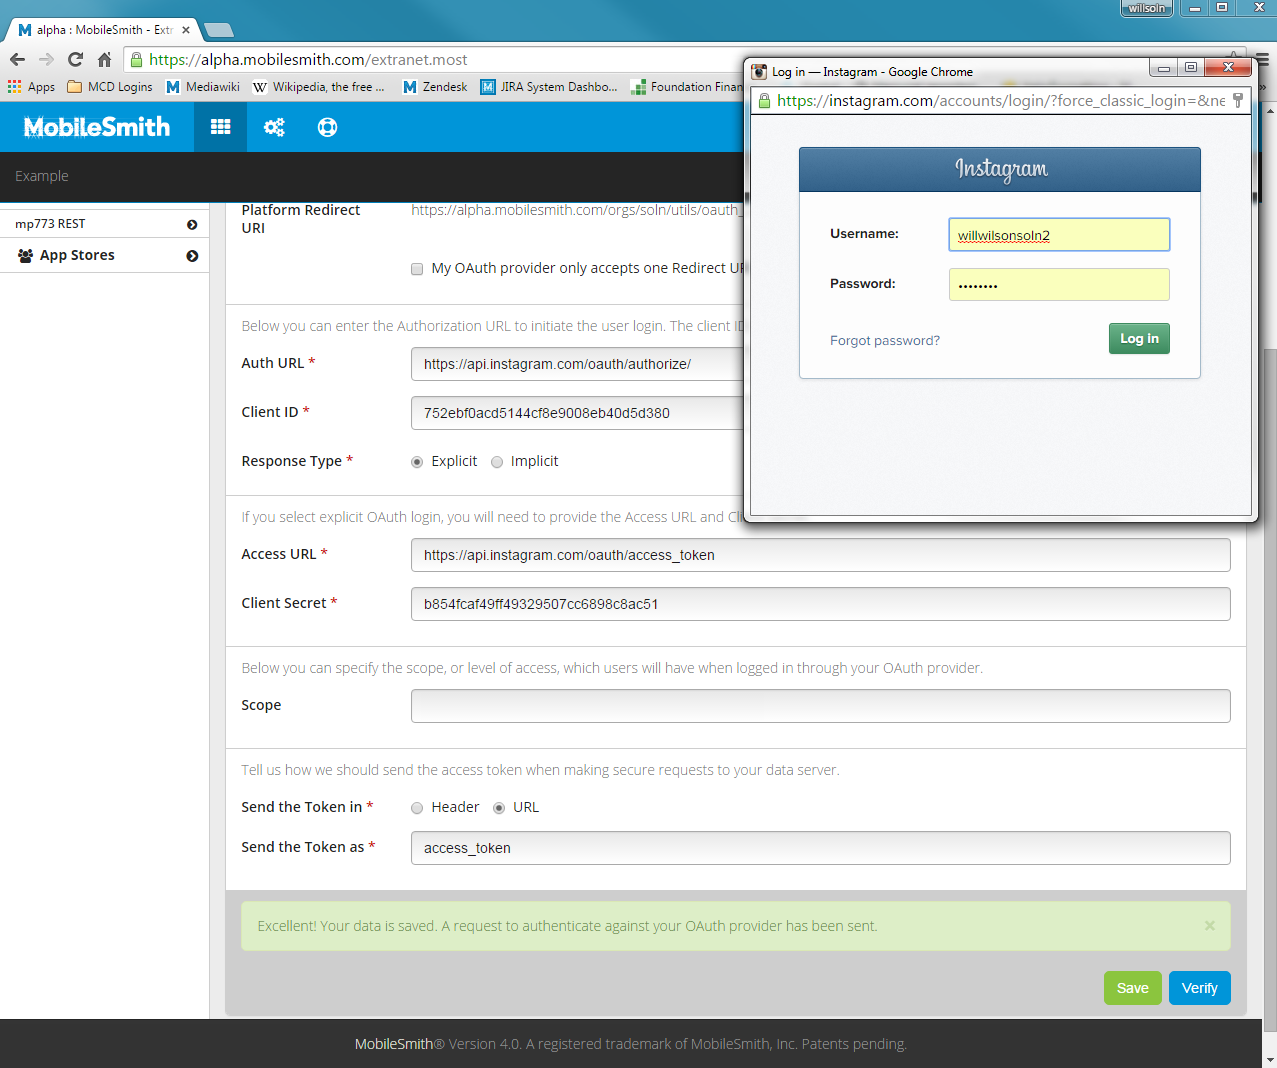
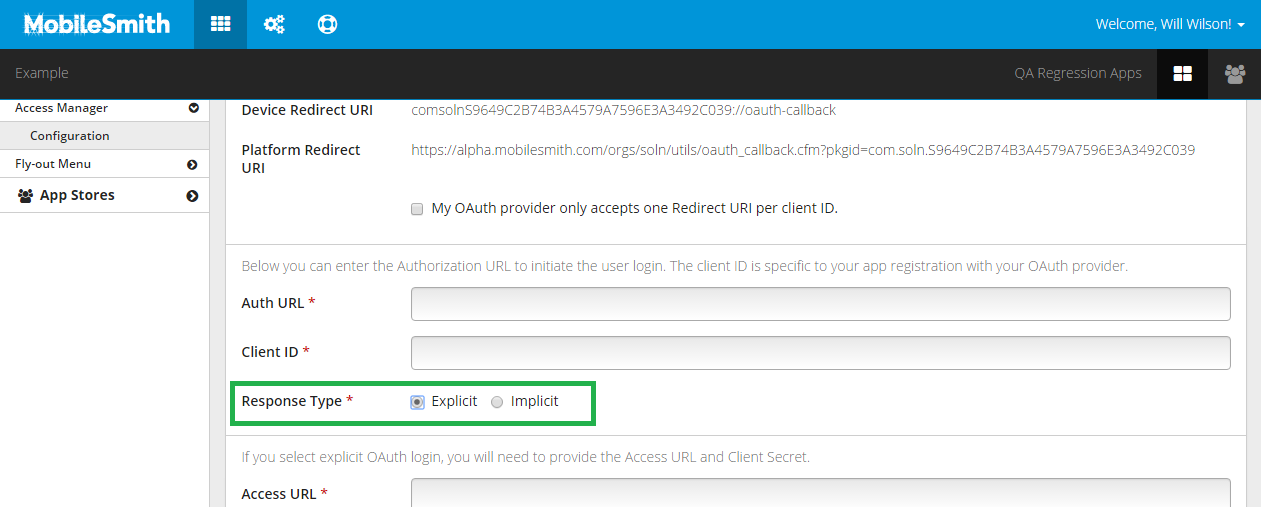
6. Select the Response Type
- Select “Explicit” for the ‘Response Type’ field.
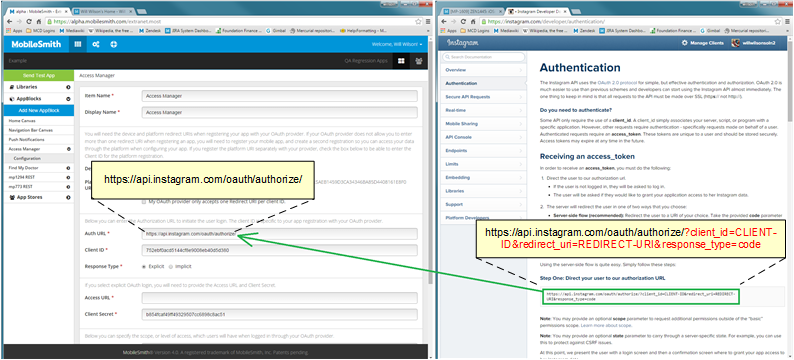
7. Enter the base Auth URL
- Enter the following in the ‘Auth URL’ field: https://api.instagram.com/oauth/authorize/
8. Enter your Client ID and Client Secret
- Paste your Client ID into the ‘Client ID’ field.
- Paste your Client Secret into the ‘Client Secret’ field.
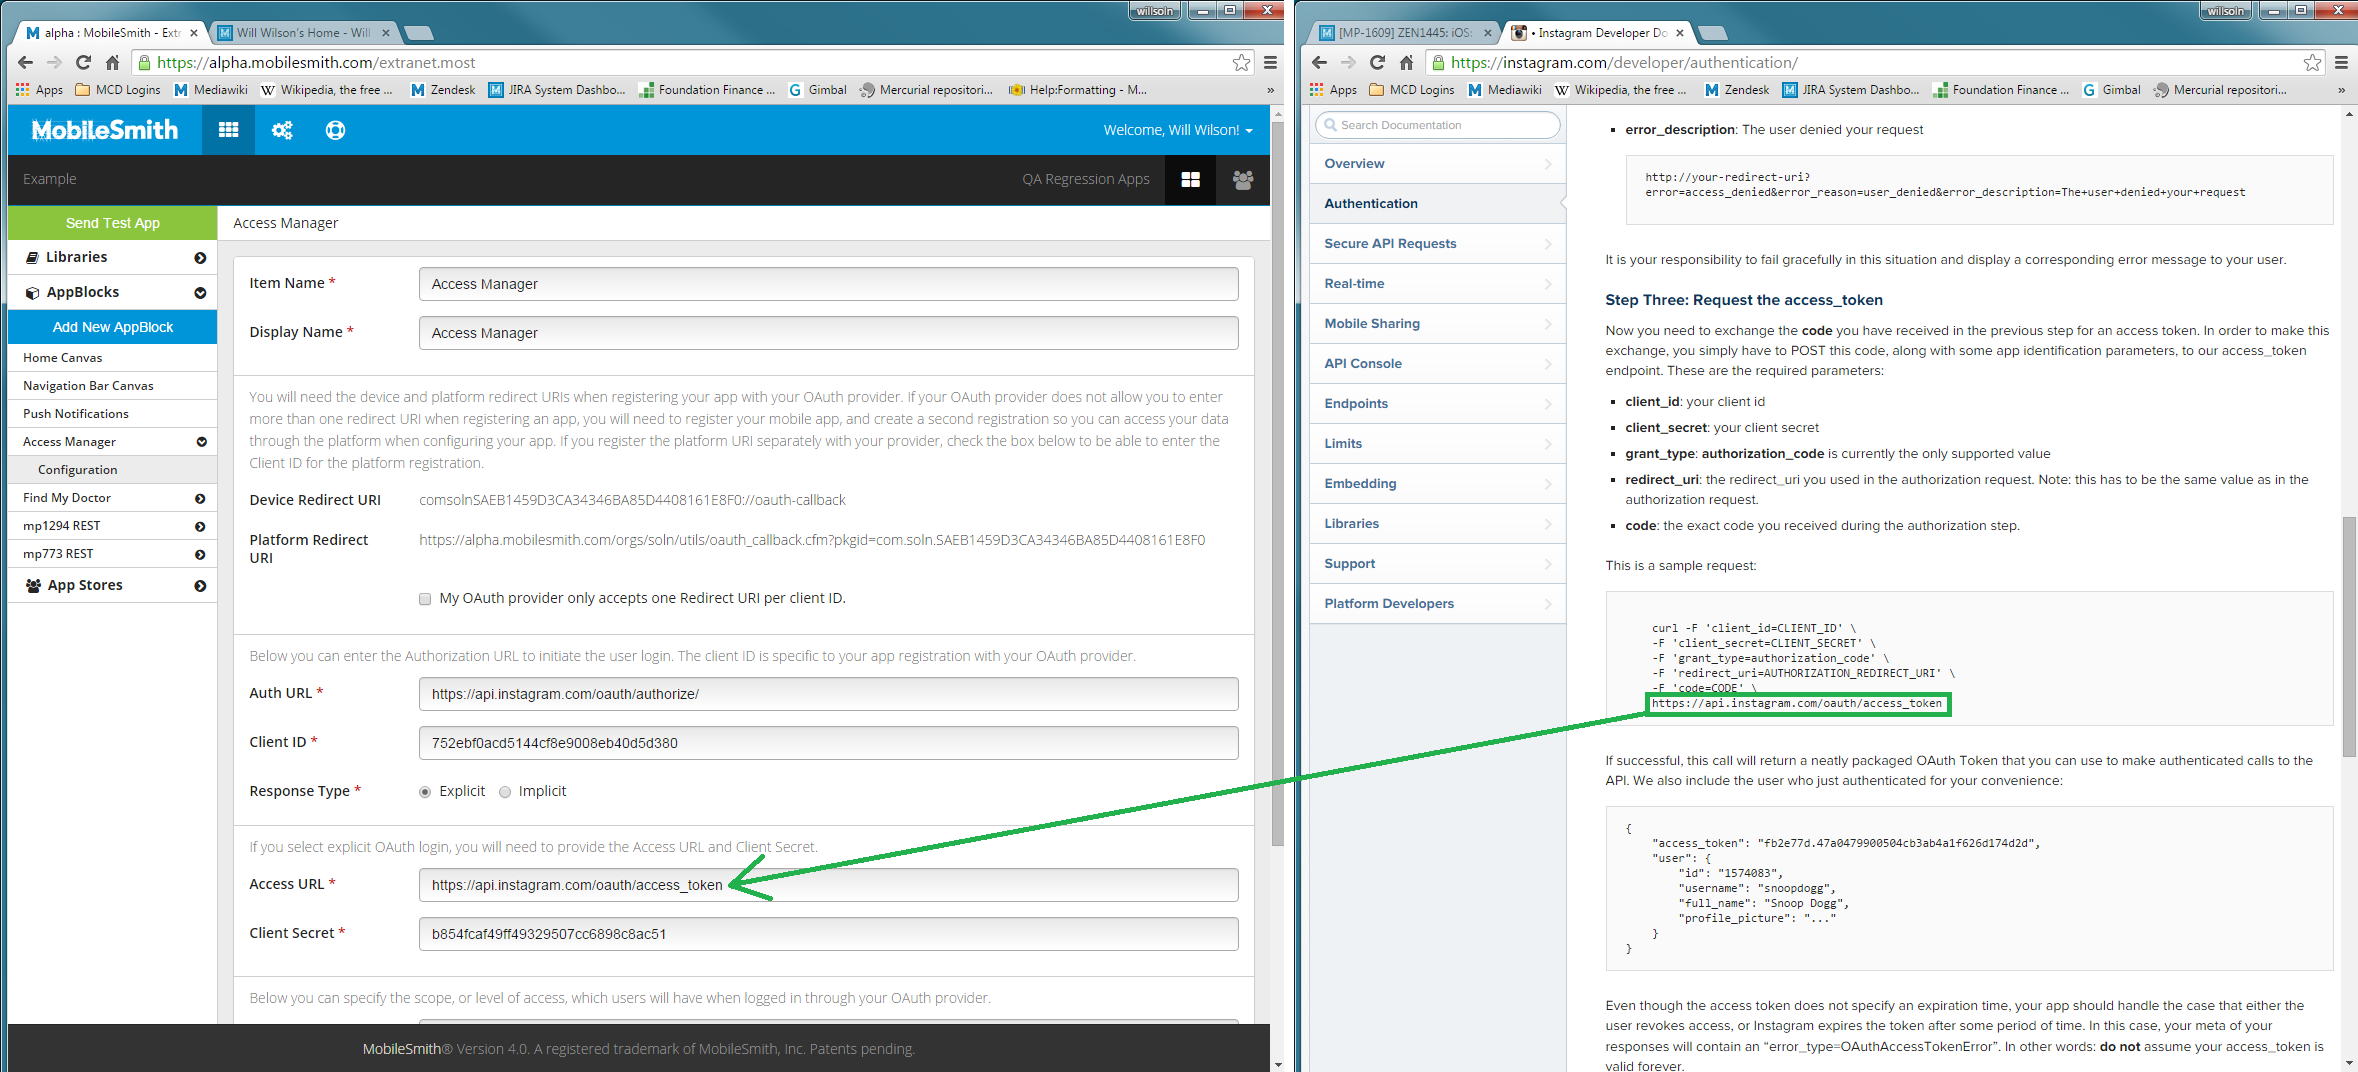
9. Enter the Access URL
- Enter the following in the ‘Access URL’ field: https://api.instagram.com/oauth/access_token
10. Enter the Scope data (Optional)
- Instagram does not require Scope data, so you can leave this field blank.
11. Set the token settings
- Select “URL” for the ‘Send the Token in’ field.
- Enter the following in the ‘Send the Token as’ field: access_token
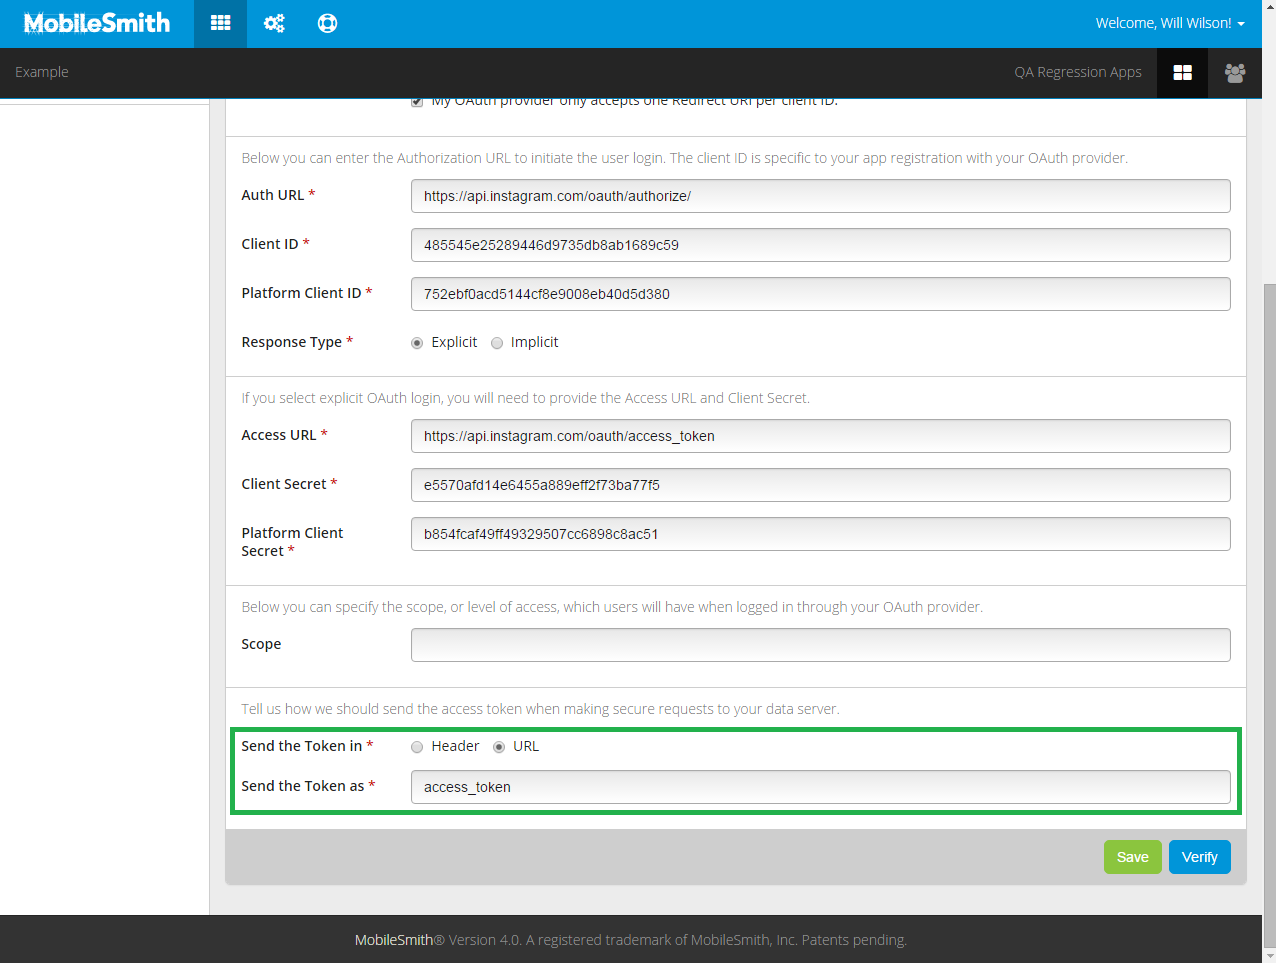
12. Authenticate
- Click “Verify”. This will save your settings and initiate the platform authentication process.
- A popup window from Instagram shows up.
- If you are not logged in to Instagram, this window will let you do so.
- If you are already logged in to Instagram, this window will display briefly and then disappear.
- You will see a success message: “You have successfully authenticated against your OAuth provider.”